I have been so grateful for all that amateur radio has given me in my life, so with a little help I created this website to give back to the community in some small measure. I hope you find a ton of useful ham radio stuff here to help you with your amateur radio hobby. Amateur radio is a fantastic hobby that has been active for over a hundred years. With so much equipment out there, and so many things you can do with ham radio, it can get a bit overwhelming.
That’s where we come in! In these pages, you will find reviews, in-depth tests, and product suggestions from people who have already bought the equipment and used it in the field. We are not professional reviewers, not salesmen, and certainly not equipment manufacturers, so we have only your best interest at heart. Yes, if you purchase an item using a link on this website we get a tiny commission that helps us keep the website paid for, but that’s it.
If you have comments or suggestions for amateur / ham radio equipment we should cover, let us know. 73s!
QRP ham radio is basically about doing more with less. Instead of seeing a 5-watt power limit as a handicap, QRP operators turn it into an exciting challenge. This approach to ham radio has been around since the early 1920s, attracting operators who love making contacts with minimal power—sometimes as low as 100 milliwatts or even less.
You might wonder how anyone could make contacts with such tiny power levels when most standard rigs pump out 100 watts or more. The answer is simple. QRP operators focus on optimizing every part of their station—from antennas to operating technique. I’ve seen operators work stations thousands of miles away using less power than it takes to run a nightlight!
QRP operation really shines during emergency situations. When the power grid goes down and you’re running on batteries, every watt counts. That’s why organizations like ARRL recognize the value of QRP—during Field Day, QRP contacts are worth five times as many points as those made with standard power.
For many hams like myself, the appeal goes beyond just practical considerations. There’s something deeply satisfying about building a simple radio with your own hands and then using it to talk to someone across the country. Not surprisingly, over 70% of Summits on the Air activations in North America use CW mode, which works great with QRP power levels.
Groups like the QRP Amateur Radio Club International keep the spirit alive by offering awards such as the “thousand-miles-per-watt” achievement. This encourages operators to push what’s possible with minimal resources—and believe me, the results can be astonishing.
Is QRP easy? Definitely not. It requires patience, skill, and sometimes a bit of luck with band conditions. But that’s exactly why it’s so rewarding. When you make that contact with someone 2,000 miles away using just 5 watts, you’ll understand why so many of us are hooked on QRP.
In this article, I’ll walk you through why QRP operation might be the most fun you’ll have in ham radio, what equipment works best for low-power operation, and the techniques that will help you succeed on the air with minimal watts.
What Does QRP Mean in Ham Radio?
Ever wonder where that term “QRP” actually comes from? Like many aspects of ham radio, it’s rooted in the practical needs of early radio operators. The term comes from the Q codes that operators used extensively back in the days when everything was sent via Morse code.
Origin of the QRP Code in Morse Communication
In the early days of radio, operators needed shortcuts to communicate effectively using Morse code. Imagine trying to type out “Could you please reduce your transmitter power as your signal is overloading my receiver?” using just dots and dashes! Instead, they could simply send “QRP?” as a question meaning “Shall I reduce power?” or “QRP” as a command meaning “Reduce power.”
This simple code saved time and effort when every character had to be tapped out by hand. As radio technology evolved through the mid-20th century, the meaning of QRP gradually shifted. I remember reading in some old ham magazines from the 1970s that QRP initially meant any operation using less than 100 watts when transistors were still new technology. Over time, the definition narrowed down to what we accept today.
What fascinates me about QRP’s evolution is how it transformed from a simple request to reduce power into an entire operating philosophy centered on using minimal power by choice rather than necessity.
Standard Power Limits for CW and SSB Modes
These days, the ham radio community has pretty much standardized what counts as QRP operation. If you ask most operators or check the rules for QRP contests, you’ll find QRP defined as:
5 watts or less output power for CW (Morse code), AM, FM, and digital modes
10 watts PEP (peak envelope power) or less for SSB (single sideband) voice communications
Not everyone agrees with these limits, though. I’ve been in some heated discussions with operators who insist that 5 watts should be the standard across all modes. The American Radio Relay League (ARRL) officially supports the 5W/10W split standard, which has become the benchmark for QRP contests and award programs globally.
For those really looking to challenge themselves, there’s even “QRPp” – operating with less than 1 watt of power. Just imagine making a contact thousands of miles away using less power than a keychain flashlight!
Here’s something many new operators don’t realize – dropping from 100 watts to 5 watts only reduces your signal by about two S-units on the other end. That’s not as dramatic as it might seem. In practical terms, it means if someone is hearing you at S9 with 100 watts, they’ll still hear you at S7 with 5 watts – perfectly readable under good conditions.
The QRP Amateur Radio Club International uses these power definitions (5W CW/digital and 10W SSB) as the official standards for their contests and awards programs. These standardized definitions make it possible to have fair competition in QRP-specific contest categories while creating clear benchmarks for achievement awards like the thousand-miles-per-watt honor.
Interestingly, these limits align perfectly with the fundamental amateur radio principle in FCC Part 97.67(b), which states that stations “shall use the minimum amount of transmitter power necessary to carry out the desired communications.” In many ways, QRP operators are simply taking this principle to its logical conclusion.
There’s something deeply satisfying about making contacts with minimal power. Beyond just the technical definition of “5 watts or less,” QRP represents a distinct philosophy that emphasizes skill over brute force. I’ve found this approach changes how I think about radio operation entirely.
FCC Part 97 and Minimum Power Rule
Did you know the FCC actually encourages minimalist operation? It’s true. Section 97.313(a) states that amateur stations “must use the minimum power necessary to carry out the desired communications”. While many hams gloss over this rule, QRP operators take it to heart. We don’t see this as a limitation but rather as a challenge to refine our skills.
I’ve always appreciated how the FCC recognizes the emergency communications aspect of amateur radio. Section 97.1 specifically highlights “providing emergency communications” as a primary purpose of our service. When you operate QRP, you’re not just having fun—you’re practicing skills that could prove crucial during disasters when power is limited.
Reducing Interference and Power Consumption
One thing I love about running QRP is that my neighbors never complain about TVI or other interference issues. As another operator once told me, “It’s a pretty rare occasion when operating with 5 W causes interference”. This makes QRP perfect for apartment dwellers or anyone in close quarters with neighbors.
The power savings might seem insignificant at first glance, but they add up. My electric bill certainly notices the difference between running 5 watts versus a full 1500-watt amplifier during contest weekends! Plus, transmitters typically last much longer when not pushed to their limits.
Emergency Communication and Battery Efficiency
Having been through several power outages in my area, I can tell you firsthand that battery efficiency becomes critical during emergencies. My QRP setup can run for days on a single deep-cycle battery, while friends with 100-watt rigs quickly find themselves without communication capabilities.
Many QRP radios offer multiple power settings—”10, 5, 2.5, 1 or 0.5 watts of power”—allowing you to tailor your output precisely to what’s needed. This flexibility is priceless when you’re operating off-grid.
The solar charging option works beautifully with QRP. I’ve powered my entire station with a modest solar panel during summer field operations. As one experienced operator notes, “Many hams charge them from solar arrays and a suitable regulator”, creating truly independent communications systems.
QRP operation is a lot like fishing with ultralight tackle. Sure, you could use heavy equipment and brute force, but where’s the skill in that? The real satisfaction comes from finesse and technique. I’ve made contacts from Florida to Japan running just 2 watts during good band conditions—an achievement that still gives me more pride than any high-power contact ever could.
Let’s face it – operating QRP isn’t easy. When you’re running just 5 watts or less, you’re trading raw power for finesse and skill. While the big gun stations can blast through poor conditions with their 1,500 watts, we QRP operators need to develop specialized techniques to make successful contacts. It’s like bringing a fishing rod to a fishing tournament while everyone else shows up with nets and trawlers!
Signal-to-Noise Ratio in QRP Contacts
The biggest challenge in QRP operation is maintaining a good signal-to-noise ratio (SNR). Here’s an interesting fact – dropping from 100 watts to 5 watts reduces your signal strength by only 13dB, which is about 2 S-units on the receiver’s meter. If a 100-watt signal hits the other station at S8, your 5-watt signal would still be a respectable S5 or S6.
This difference might not seem like much when band conditions are excellent, but it becomes critical when you’re operating near the noise floor. I’ve had plenty of contacts where my signal was just barely above the noise, dancing right at the threshold of readability. As one operator puts it, “there is a threshold effect on HF where changes in power has a disproportional effect to your communications effectiveness”.
To overcome these challenges, QRP operators have developed some clever techniques using specialized modes:
QRSS: This is extremely slow CW that allows for very narrow filtering
Coherent CW: Uses precisely calibrated signals for ultra-narrow receiver filtering
In my experience, plain old CW (Morse code) remains the champion for QRP work. A single tone cuts through the noise much better than a voice signal, which spreads its energy across a wider frequency range. This is why I almost always reach for the key when operating QRP.
Importance of Operator Skill and Timing
When you’re limited to a few watts, your operating technique becomes absolutely crucial. I’ve found that listening is probably the most important skill you can develop. Before calling a DX station, I typically spend 5-10 minutes just observing: Is the operator working by call areas? Are they listening up or down? Do they have a pattern?
Timing your calls strategically makes a huge difference in your success rate. Instead of jumping in with the pack right after a CQ, I wait until that initial rush subsides. “When you hear that pause, slip your call in just once. That’s all you have time for”. This technique has helped me work some pretty rare DX that I had no business getting with 5 watts!
Using Skeds and Spotting Tools for Better Reach
Smart QRP operators use every advantage available. The VOACAP propagation prediction website is an incredible tool that helps identify the optimal times and frequencies for specific paths. By understanding propagation cycles—daily, seasonal, and solar—you can capitalize on band openings that make your tiny signal sound like a powerhouse.
Since QRP signals can easily get lost in the noise, dedicated spotting networks have emerged to help. These “QRP spotting Clusters” let you announce your frequency, mode, and equipment details, helping to concentrate attention from potential contacts.
Most QRP operators are also familiar with the QRP calling frequencies on each band, like 14.060 MHz for 20-meter CW. These frequencies create gathering points for like-minded operators, increasing your chances of making solid contacts with other low-power enthusiasts.
The bottom line is that QRP success depends less on your watts and more on your operating strategy: “With QRP you have to wait for the right moment and make your move. This means you must be alert and listening rather than transmitting”. In other words, QRP operation rewards patience and skill over brute force—which is exactly why I find it so satisfying!
When it comes to QRP gear, you’ve got options ranging from dirt-cheap DIY kits to fancy commercial rigs that’ll cost you a pretty penny. This variety is actually one of the best things about QRP—you can get started for under sixty bucks or go all-in with premium equipment if that’s your thing.
Popular DIY Kits: QRP Labs QCX and BITX40
I’ve built several QRP kits over the years, and the QRP Labs QCX series stands head and shoulders above most others. These kits offer incredible bang for your buck. You can grab a single-band version (available for 160-17 meters) that pumps out about 3-5 watts depending on your power supply. The receive current is only 123mA—super efficient compared to commercial rigs. The QCX Mini version costs just $57.79, which is honestly ridiculous for what you get.
If you want to cover more bands, their QMX offers five bands with CW, digital, and SSB modes for $102.47. Another kit I’ve tinkered with is the BITX40, which is great if you like to modify and expand your radio after building it.
The best part about building kits isn’t even saving money—it’s understanding how your radio actually works. When something goes wrong (and something always does eventually), you’ll know exactly how to fix it because you put every component in place yourself. Plus, there’s just something deeply satisfying about making a contact on equipment you built with your own hands.
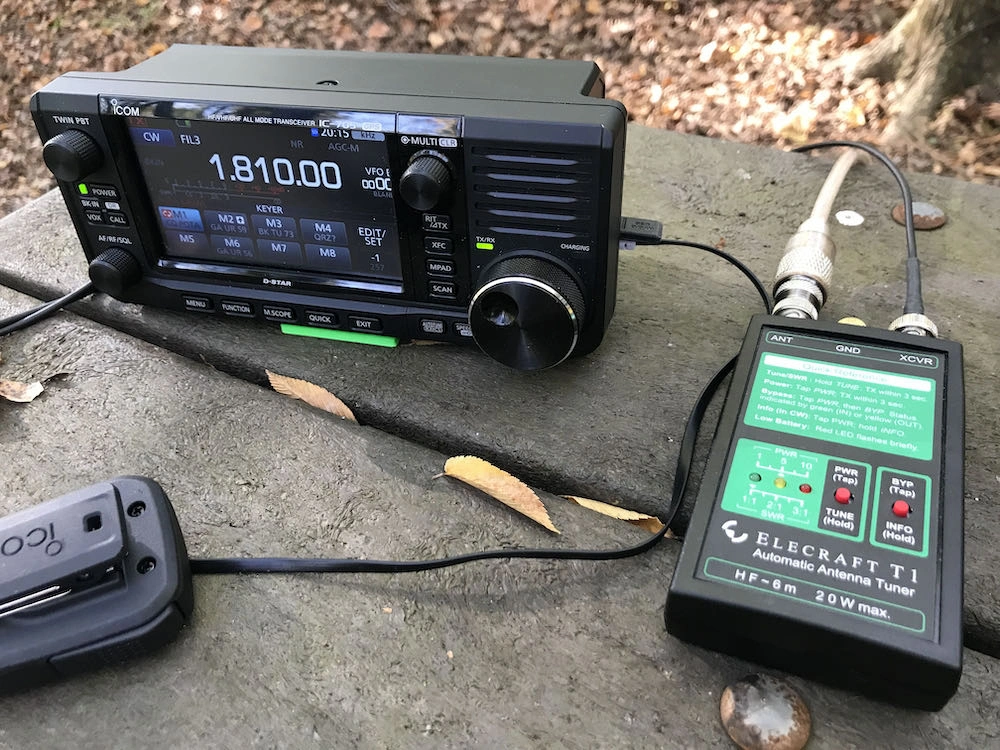
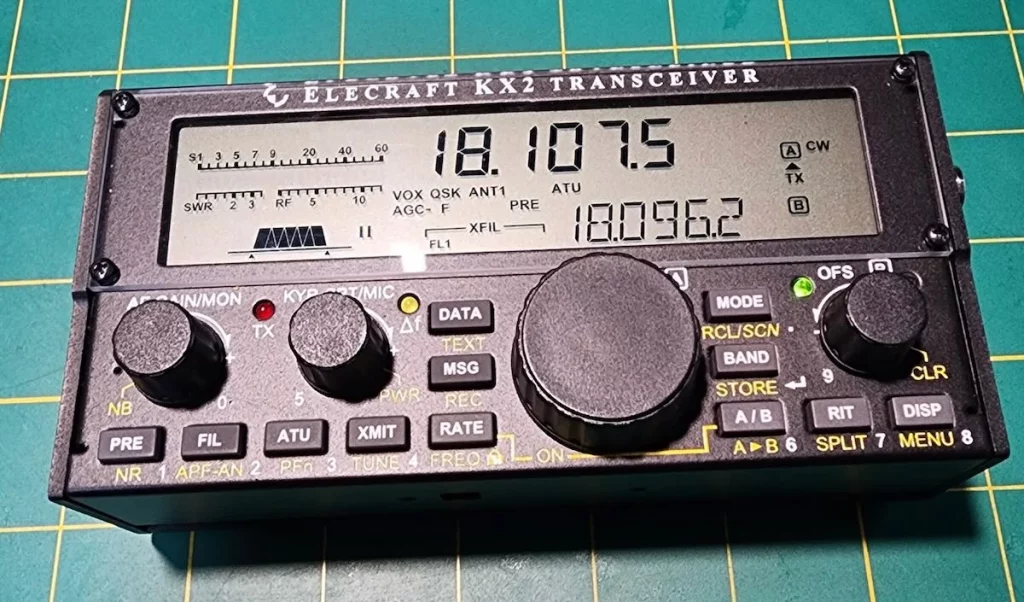
Commercial QRP Radios: Yaesu FT-818, Elecraft KX2
On the commercial side, the Yaesu FT-817/818 series has been around forever, and for good reason. The newer FT-818ND pumps out 6 watts (up from the original’s 5 watts) and costs around $650. It doesn’t have fancy touchscreens or modern bells and whistles, but it covers everything from 160 meters all the way through UHF and has both SO-239 and BNC antenna ports. This makes it insanely versatile for field operations.
For those with deeper pockets, the Elecraft KX3/KX2 is about half the size and weight of the FT-818 but delivers more punch—up to 12 watts on 80-20 meters and 10 watts on the higher bands. The battery efficiency is where the KX2 really shines though. It draws only 150mA on receive compared to the FT-818’s battery-hungry 400mA. That’s a huge difference when you’re operating portable.
Another option worth mentioning is the lab599 Discovery TX-500. This rugged little rig has been gaining popularity for its weatherproof design and excellent battery performance. In a recent QRP radio survey, it picked up 3.9% of votes despite being relatively new to the market.
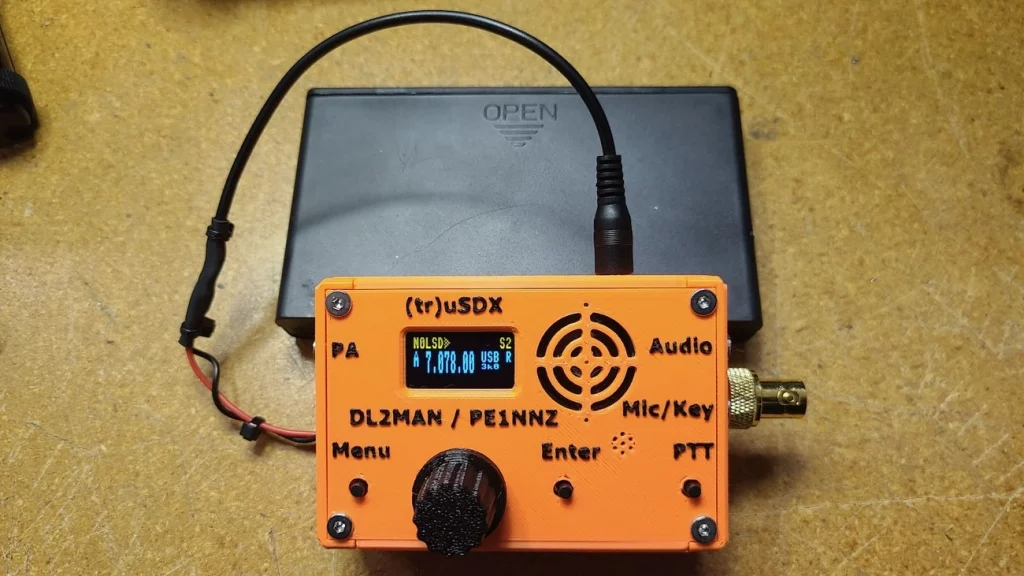
For something a little less expensive that is almost a hybrid between kit and commercially available, try the tr usdx transeiver. This little guy runs under $150 and covers 80/60/40/30/20m at 5W, in only 140g without the power supply. You can even get 1/2W on a 5V power supply.
Choosing Between Kit-Build and Ready-to-Use Radios
So should you build or buy? The answer depends on a few things. If you’re good with a soldering iron and enjoy the process, kits like the QCX give you way more radio per dollar. The QCX Mini kit costs $57.79, while the fully assembled version runs $102.79—that’s a $45 premium just to avoid construction.
Commercial radios do have their advantages though. They’re typically more rugged and packed with features. I’ve seen operators drop their KX2 multiple times and get caught in rainstorms with it, only to have the radio keep working perfectly. Try that with most homebrew gear!
For beginners without much technical experience, I usually recommend starting with a commercial option. You can always build kits later when you’ve got more experience. Many QRP enthusiasts (myself included) end up with both—commercial equipment for reliability and homebrew gear for the fun of it.
When deciding what’s right for you, consider:
Your technical skills and patience for troubleshooting
Which bands and modes you want to operate
Your budget (obviously)
Where you’ll be using it (home or field)
Available power sources
No matter which route you take, QRP equipment just keeps getting better. Today’s radios pack incredible capabilities into tiny packages, making low-power operation more accessible than it’s ever been.
When you’re only pushing a few watts of power, every single element in your radio system needs to pull its weight. I’ve learned through years of QRP operation that your antenna system and choice of transmission mode make all the difference between frustration and success.
Full-Size Dipoles vs Compromise Antennas
If there’s one thing I can’t stress enough about QRP operation, it’s this: antenna efficiency is absolutely critical. When you’re running 100 watts, you can get away with a mediocre antenna. With 5 watts or less? Not a chance.
I’ve found full-size dipoles to be the best bang for your buck in most situations. They convert your precious few watts into effective radiated power far more efficiently than shortened alternatives. As one experienced operator puts it, “My advice to travelers is to carefully tune your antennas, use full size wire dipoles, and save your money”.
For portable operations like SOTA (Summits On The Air), I prefer end-fed half-wave antennas. They’re lightweight, easy to set up, and have outstanding radiation efficiency. I’ve made contacts from mountaintops across several states with just 3 watts and a simple wire thrown into a tree.
Whatever you do, avoid physically shortened antennas with loading coils or traps if possible. They might be convenient, but they’re essentially “wasting” precious signal strength that QRP stations simply can’t afford to lose.
Interestingly, my field tests comparing different antennas showed the 30-meter band to be particularly effective for portable QRP work. It offers reliable coverage at short and medium distances during daylight hours—exactly when most portable operations happen.
CW and Digital Modes for Efficient Transmission
The mode you choose can make or break your QRP experience. Have you ever tried making SSB voice contacts with 5 watts during a contest? It’s possible, but it sure isn’t easy!
CW (Morse code) stands out as exceptionally effective for QRP. This isn’t just my opinion—it’s physics. A single tone cuts through noise far better than a voice signal, which spreads energy across multiple frequencies. Real-world data confirms that “CW is preferred over SSB for low power operation because CW delivers better signal-to-noise ratio than SSB”.
If you’re not a CW operator, digital modes like FT8 and WSPR take efficiency even further. I’ve made FT8 contacts to Australia from the eastern US using just 2 watts! VOACAP simulations back this up—an operator using 1W on 30 meters with a dipole showed only about 40% probability of SSB contacts within 600 miles, while CW bumped that up to 90% reliability within the same distance. Digital modes extended the range even further.
Using VOACAP to Predict Propagation Windows
One of my favorite QRP techniques is using VOACAP (Voice of America Coverage Analysis Program) to identify optimal times and frequencies before I even turn on the radio. This free online tool takes the guesswork out of operating by analyzing:
Solar flux and sunspot numbers
Time of day and season
Distance between stations
Antenna characteristics
The propagation wheel visualization is particularly useful, showing exactly when signals on specific bands will likely get through to your target area. Why waste battery power calling when the odds are against you? I’d rather wait for the right window and make the contact on the first try.
This strategic approach has completely transformed my QRP operation. Instead of randomly calling and hoping, I now concentrate my efforts during optimal propagation windows. The result? More contacts, less frustration, and a much more enjoyable operating experience.
The QRP world is more than just a technical pursuit – it’s a thriving community of like-minded operators who enjoy doing more with less. I’ve been involved with several QRP clubs over the years, and the camaraderie among low-power enthusiasts is truly something special. These groups offer much more than just technical advice – they provide recognition, encouragement, and plenty of opportunities to test your skills against other QRP operators.
QRP ARCI and G-QRP Club Activities
The QRP Amateur Radio Club International (QRP ARCI) is probably the best-known organization dedicated to low power operation. They put out an excellent “QRP Quarterly” magazine that’s packed with useful information, from antenna designs to operating tips. Every year at Dayton Hamvention, they host the “Four Days In May” (FDIM) conference, which I try to attend whenever possible. It’s incredible to see hundreds of QRP enthusiasts gathered in one place sharing ideas and experiences.
Across the pond, the G-QRP Club has been keeping the low power spirit alive since 1974. Their quarterly magazine “SPRAT” is a gold mine of circuits, technical hints, and construction projects. I’ve built several gadgets from SPRAT articles over the years, and they almost always work better than expected. The club also offers various achievement awards such as the G2NJ Trophy for technical articles and the Partridge Trophy for antenna innovations.
Thousand-Miles-Per-Watt and Other Awards
The “1000 Miles per Watt” award is like the holy grail for QRP operators. I remember the first time I qualified for this one – I made a contact from Ohio to California using just 3 watts, giving me around 1200 miles per watt. The calculation is simple: just divide the distance in miles by your power in watts. Organizations like QRP ARCI, NAQCC, and SKCC all offer variations of this award.
I’ve heard of operators achieving over 1700 miles per watt using just 500 milliwatts! That’s the kind of achievement that makes QRP so addictive – there’s always someone pushing the boundaries further than you thought possible.
Beyond the 1000 MPW award, there are dozens of other awards specifically for QRP operators:
QRP DXCC Award from ARRL for working 100 countries with 5 watts or less
WAC-QRP for working all continents with QRP power
Milliwatts per Kilometer (MPK) Award for the truly power-miserly
If you join QRP ARCI, you can claim up to five awards per year at no additional cost, which is a nice benefit of membership.
QRP Categories in Major Ham Radio Contests
Just about every major ham radio contest now includes QRP categories, which means you’re competing against other low-power stations rather than the big guns. This levels the playing field and makes contesting much more enjoyable for QRP enthusiasts.
I particularly enjoy the AGCW-DL QRP Contest held every March and the ARS Flight of the Bumblebees at the end of July. The Bumblebees event is especially fun because it combines portable operation with QRP power levels.
There are also some quirky contests like the “Sasquatch Stomp” from the Pacific North West QRP Group that add a bit of humor and creativity to QRP contesting.
What I love most about these events is the sense of community they foster. Even though we’re all competing, there’s a shared understanding that we’re all crazy enough to be trying to make contacts with tiny amounts of power. When you make a contact with another QRP station during one of these contests, there’s often an acknowledgment of mutual respect that you just don’t find in the high-power categories.
Conclusion
QRP radio is one of those things in ham radio that turns limitations into opportunities. Instead of seeing the 5-watt limit as a handicap, we see it as a challenge that makes each contact more meaningful. After all, anyone can make contacts with 1,500 watts and a massive beam antenna – where’s the fun in that?
I’ve been operating QRP for years now, and the satisfaction I get from making a DX contact with just a few watts is unmatched by any other aspect of the hobby. It’s like fishing with ultralight tackle – the experience becomes more about skill and finesse than brute force.
The practical benefits of using low power go way beyond the challenge factor. When you’re operating from a battery during Field Day or an emergency, running QRP means your power lasts much longer. Your neighbors will thank you too – I’ve never had a single TVI complaint when running 5 watts!
Equipment options have never been better for QRP operators. Whether you’re looking to build something yourself or buy a commercial rig, there’s something for every budget. I started with a simple QCX kit that cost me less than $60, and the contacts I’ve made with it still amaze me. If you prefer something ready-to-go, radios like the Elecraft KX2 or Yaesu FT-818 pack incredible performance into portable packages.
Remember though, your antenna system is even more important than your radio when running QRP. A full-size dipole up high will outperform any fancy shortened antenna when every milliwatt counts. I’ve learned this lesson the hard way!
Operating technique makes all the difference when running low power. CW and digital modes give you the best bang for your watt, and timing your calls strategically can make your 5 watts sound like 100 to the receiving station. Tools like VOACAP help me identify when propagation will work in my favor – why waste battery power calling when the band isn’t open?
What really keeps some into this, though, is the community. Groups like QRP ARCI and the G-QRP Club connect like-minded operators around the world. When I earned my “thousand-miles-per-watt” award, I felt like I’d joined a special club of operators who value skill over raw power.
Is QRP for everyone? Probably not. It requires patience and the willingness to accept that sometimes conditions just won’t cooperate. But if you’re looking for a challenge that will sharpen your operating skills and provide a deep sense of accomplishment, give it a try. You might just find, like I did, that less power really does bring more operating fun.
There are a few full ham radio brands or manufactures, and then there are some who build designs from other people, and then there are some who actually buy radios made by someone else and slap their own stickers on them. The question is, who is doing what, and does it matter?
I want to start out with the big boys.
Yaesu
Yaesu Musen Co., Ltd. was founded in 1959 by Sako Hasegawa in the Yaesu district of Tokyo, Japan. Originally focused on producing high-performance radio transceivers for amateur use, Yaesu quickly gained a reputation for quality and innovation. By the 1960s, the brand had entered the global market, particularly the U.S. and Europe, with iconic HF models like the FT-101, which became a standard in many ham shacks for its modular design and robust build.
Over the decades, Yaesu has remained a top-tier brand in amateur radio, pioneering advancements in digital modes and portable gear. The company was rebranded under the Vertex Standard name for a period, butlater returned to its core focus under the Yaesu name. Its innovations include the introduction of System Fusion, a digital voice and data mode that competes with D-STAR and DMR. Yaesu’s extensive lineup—from compact HTs like the FT-60R, powerful touchscreen HTs like the FT5DR, andfull-featured HF rigs like the FTdx101D—continues to be highly regarded by amateur radio operators worldwide.
Kenwood
Kenwood, originally known as Kasuga Radio Co., Ltd., was founded in 1946 and later became Trio Corporation. The Kenwood name was adopted for international marketing in the 1960s, and eventually the company unified under that brand. Kenwood entered the amateur radio market in the 1950s and rose to prominence with the TS-series HF transceivers. The TS-520, launched in the 1970s, became a benchmark in the ham community for its reliability and performance.
Throughout the 1980s and 1990s, Kenwood continued to lead with advanced multimodetransceivers and handhelds. Radios like the TS-940 and TH-79 showcased cutting-edge features for their time. While Kenwood diversified into consumer electronics and car audio, its amateur radio division remained strong, although it has narrowed its product offerings in recent years. Nonetheless, Kenwood radios remain popular, especially in VHF/UHF handheld and mobile categories, and the TS-890S continues its legacy in the HF/50MHz space.
While they no longer manufacture as many handheld models as they once did, the TH-D75 is second to none.
Icom
Icom Incorporated began as Inoue Communication Equipment in 1954, founded by Tokuzo Inoue in Osaka, Japan. The company initially made test equipment but shifted toward radio communications in the late 1950s. By the 1960s, Icom was producing some of its first amateur radio gear, building a loyal following among operators who valued its blend of performance and affordability. The IC-701, introduced in the 1970s, marked Icom’s entry into serious HF gear and solidified its place in ham radio history.
Icom is widely credited with leading innovation in digital amateur communications. It was the first to launch radios supporting the D-STAR digital voice/data protocol, in collaboration with the Japan Amateur Radio League. Icom’s range—from compact HTs like the ID-52A to flagship HF rigs like the IC-7851—showcases a balance of user-friendly design and advanced technology. The IC-7300 and IC-705 have particularly revitalized interest in SDR (Software Defined Radio) among hams and solidified Icom’s status as a leader in the modern era of amateur radio.
Alinco
Alinco, Inc. was established in 1938 but didn’t enter the amateur radio market until the mid-1980s. Initially involved in power tools and industrial equipment, Alinco shifted to radio communications with a line of affordable VHF/UHF handhelds and mobiles. Unlike its larger competitors, Alinco focused on practicality and value, earning a loyal user base among entry-level and budget-conscious hams.
Although not as dominant in the high-end HF market, Alinco has made notable contributions with compact and innovative designs such as the DJ-series handhelds and DR-series mobile radios. The company also introduced some early models with built-in TNCs for packet radio, and its all-mode VHF/UHF base rigs like the DR-135 and DR-735 are still in use today. While often overshadowed by the “big three,” Alinco remains a respected player in the ham community, known for its reliability, simplicity, and good customer support.
China
Over the last decade or so, China has entered the amateur radio market that was all but dominated by Japan. Starting around 2012 with the introduction of the Baofeng UV-5R, affordability was their strength. Today, the overwhelming majority of amateur radio handhelds are manufactured in China, even including brands such as Yaesu attempting to lower costs on their entry level products.
Baofeng
Baofeng, officially known as Baofeng Electronic Co., Ltd., is a Chinese manufacturer headquartered in Shenzhen, China, founded in 2001. The company originally focused on producing affordable two-way radios for commercial, industrial, and public safety use. However, Baofeng gained global recognition in the amateur radio community around 2012with the release of the UV-5R, a compact dual-band (VHF/UHF) handheld transceiver that quickly became a disruptive force in the market. Priced far below competitors—often under $40 USD—the UV-5R opened the door for many new amateur radio operators who previously saw the hobby as cost-prohibitive.
The UV-5R and its variants (like the BF-F8HP, UV-82, and GT-3) offered basic but practical functionality, long battery life, and compatibility with open-source programming tools like CHIRP. Despite lacking advanced features and being known for inconsistent quality control and marginal RF cleanliness, the radios became wildly popular among preppers, beginners, and budget-conscious hams. Baofeng’s aggressive pricing and mass availability through platforms like Amazon and AliExpress played a significant role in lowering the entry barrierfor amateur radio worldwide.
However, Baofeng’s massive success also made it a target for widespread cloning and counterfeiting, especially of the UV-5R model. Numerous small manufacturers across China began producing radios that either copied Baofeng’s design exactlyor only slightly altered it, sometimes using names like Pofung, Bofeng, Baoteng, or entirely unbranded names. Many of these clones went a step further, using falsified packaging, stickers, user manuals, and labelsto intentionally pass off the radios as genuine Baofeng products. This created confusion in the marketplace, with users unknowingly buying counterfeit units that often had lower quality components, poor performance, or outright failures to meet regulatory emission standards.
Even today, it can be difficult for consumers to differentiate between authentic Baofeng radios and well-made fakes, especially when buying from third-party sellers online. While Baofeng does have legitimate international partners—such as BaofengTechin the United States—unauthorized sales channels continue to circulate questionable products. This counterfeit proliferation has not only hurt Baofeng’s reputation in some circles but also contributed to scrutiny from regulators like the FCC, which has occasionally banned or restricted the sale of specific Baofeng models for noncompliance. Despite these issues, Baofeng remains the most visible and influential name in the ultra-low-cost handheld ham radio market.
Other Chinese manufacturers
There are a lot more Chinese radio manufacturers, substantially more than I could ever dream of keeping track of. Part of the problem is that a company will spring up, sell a ton of radios (probably cheap clones of better radios), and then close up shop, move offices, create a new company, and do it all over again.
That is not to say that all Chinese radio companies are bad. While I absolutely am not going to trade in my Kenwood, Yaesu, or Icom radios for something made in China, I am also not going to argue that the Chinese radios are the king of bang-for-your-buck in the ham radio world.
ChineseManufacturing & Design Overview
Brand
Manufactures Own Radios
Designs Own Radios
Rebrands / ODM Models
Notes
Baofeng
✅ Yes
⚠️ Limited (basic design changes)
✅ Yes (They are OEMs for others)
Operated by Fujian Nanan Baofeng Electronics
TYT
✅ Yes
✅ Yes
✅ Some shared ODMs
Makes radios for other brands too
Wouxun
✅ Yes
✅ Yes
Rarely
Known for better QC than Baofeng
Retevis
✅ Yes (via HYS/Quanzhou Retevis)
⚠️ Some custom designs
✅ Many shared designs
Shares models with TYT, Baofeng
Radioddity
❌ No
⚠️ Some collaboration
✅ Yes
Rebrands TYT, Baofeng, Qixiang (AnyTone), etc.
TIDRADIO
❌ No
❌ No
✅ Yes
Rebrands Baofeng and Retevis models
AnyTone
✅ Yes
✅ Yes
✅ ODMs for others
Brand of Qixiang Electron Science
QYT
✅ Yes
✅ Yes
✅ Some rebrands
Makes mostly mobile radios, a few handhelds
Abbree
⚠️ Possibly partial
⚠️ Some design variation
✅ Heavily rebranded
Military-style long antenna kits popular
Samcom
⚠️ Likely partial
❌ No
✅ Yes
Marketed for business and GMRS use
Fonghoo
❌ No
❌ No
✅ Yes
Resells various brands under its label
Zastone
❌ (Mostly)
❌ No
✅ Yes
Many models identical to Baofeng/Wouxun
Ailunce
⚠️ Partial
⚠️ Some unique radios
✅ Related to Retevis
Higher-end DMR line from Retevis
Luiton
⚠️ Some capability
⚠️ Some designs
✅ Yes
Often cloned Baofeng models
BTECH
❌ No (USA-based)
⚠️ Helps improve firmware
✅ Baofeng OEM
BaoFeng Tech USA; tweaks Baofeng radios for FCC market
JJCC
❌ No
❌ No
✅ Yes
Budget rebrand, often of TIDRADIO/Baofeng
Puxing
✅ Yes
✅ Yes
✅ Occasionally used by others
Once more prominent; quality close to Wouxun
LEIXEN
✅ Yes
✅ Yes
✅ Some OEM clients
Known for odd form-factor radios
FDC
✅ Yes
✅ Yes
✅ Limited OEMs
Feidaxin; now less active in the market
Hesenate
❌ No
❌ No
✅ Yes
Mostly Amazon resales under new names
Radtel
⚠️ No (partners with factories)
⚠️ Some design input
✅ Yes
Collaborates with Quanzhou factories; offers branded radios
Conclusions
I hope this has helped you understand the ham radio landscape, both currently and historically. Remember, there is no such thing as a bad radio as long as it is legal, and it does what you need it to do. Knowing who makes what for who may help you get a better deal, and know where to go if you need support.
Learning how to tune an antenna is important because a poorly tuned antenna can reflect nearly 50% of your radio’s power back into your equipment. This knowledge proves crucial for anyone who uses radio equipment – amateur radio operators, CB communicators, or professionals.
Standing Wave Ratio (SWR) measures your antenna’s efficiency. The measurement shows how well your antenna broadcasts RF energy into the air rather than bouncing it back to your transmitter. RF experts aim for an SWR below 1.5:1, while values above 2:1 reduce performance substantially. Return loss, measured in decibels (dB), works among SWR to show power returning to your radio instead of transmission. A perfect system shows infinite return loss because nothing reflects back.
Radio enthusiasts face poor signal quality, interference problems, or equipment damage due to improper antenna tuning. High SWR levels damage solid-state transmitters, though tube transmitters prove more forgiving. Standing waves on your coaxial cable create “RF in the shack” issues as SWR rises and disrupt other electronic devices.
This piece breaks down antenna tuning basics. You’ll learn about resonant frequency, impedance, and radiation patterns in clear terms. The knowledge helps you optimize your radio system’s performance, whether you’re a first-time setup or fixing an existing antenna.
Radio signals bounce back from your antenna instead of radiating into the air, and this creates standing waves. Your transmission line and antenna’s impedance mismatches cause this reflection. You’ll achieve the best antenna tuning performance by understanding these concepts.
What is SWR and how it affects signal transmission
SWR (Standing Wave Ratio) tells you how well radio frequency energy flows from your transmitter through the transmission line to your antenna. The ratio shows the maximum and minimum voltages along a transmission line. This measurement reveals how well your antenna’s impedance matches your transmission line’s impedance.
The SWR scale begins at 1:1, which means a perfect match without reflections, and extends to infinity for complete reflection. Mismatched impedances force some transmitted power back toward your radio. This creates standing waves that demonstrate voltage and current peaks and valleys along your cable.
Let’s look at what different SWR readings mean:
SWR 1:1: Perfect match, 100% of power transmitted (ideal but rare)
SWR 1.5:1: Excellent in practice with minimal reflection
SWR 2:1: Marginally acceptable with about 11% power reflected
SWR 3:1: Poor match that reflects 25% of power
Equipment stress and wasted transmitter power increase with higher SWR values. A transmitter pushing 10,000 watts with 1.05:1 VSWR creates 725 volts RMS maximum in your transmission line. The same line experiences 2,236 volts RMS at 10:1 SWR. This voltage surge can harm components and reduce system reliability.
Return loss as a measure of reflected power
Return loss gives us another perspective on signal reflection measured in decibels (dB). This measurement compares returned power to transmitted power. Better performance comes with higher numbers that indicate less reflection.
You can calculate return loss with this formula: Return Loss (dB) = -20 × log10|Γ| where Γ represents the reflection coefficient. Here’s what different return loss values mean for power reflection:
Return loss of 15 dB: About 3% power reflected (very good)
Return loss of 10 dB: Approximately 10% power reflected (acceptable)
Return loss of 6 dB: About 25% power reflected (poor)
Engineers prefer return loss over SWR because logarithmic displays make it easier to compare small and large numbers on the same scale.
Why low SWR and high return loss are desirable
Your antenna system works efficiently with low SWR and high return loss values. Here’s why these measurements matter:
Your antenna radiates nearly 97% of total energy when return loss exceeds 15 dB (VSWR less than 1.43). Poor matching wastes power, shrinks transmission range, and creates inefficient operation.
Reflected power stresses your transmission lines and radio equipment. These reflections generate voltage and current peaks that might damage sensitive components, especially in solid-state transmitters.
Better matching improves signal quality. Reflected signals can mix with your primary signal and create phase shifts and delays. These issues reduce audio quality in receivers. Digital communications need precise timing and signal integrity.
Transmission line losses grow at higher frequencies, which makes good SWR more crucial.
RF systems need a minimum return loss of 15 dB (VSWR under 1.43:1). Critical applications benefit from return loss above 20 dB, though values beyond 10 dB give diminishing practical benefits in most standard communication systems.
The success of antenna tuning depends on accurate measurements. You need the right tools and techniques to measure SWR and return loss. Without them, antenna system optimization becomes pure guesswork. The simple SWR meter is usually the first tool an operator acquires when learning how to tune an antenna.
Using an SWR meter: single vs dual needle
SWR meters come in two main designs. Each design gives you different advantages for measuring signal reflection.
Single-needle meters like the Fumei RS-40 shown here need manual calibration before each measurement. The user sets the meter to “calibration” or “forward” position and transmits a signal. Next, they adjust the calibration knob until the needle matches the calibration mark. The meter then switches to “SWR” or “reflected” position to get the actual reading. Many radio operators like single-needle models because they allow exact manual calibration. This process requires specific steps for each measurement.
Cross-needle (dual-needle) meters like the Daiwa CN-501H shown above, show both forward and reflected power at the same time with two separate needles. The point where these needles cross shows the SWR value without any calibration. This setup gives you three measurements at once: forward power, reflected power, and SWR. Dual-needle meters help you make quick assessments and dynamic adjustments easily.
Connecting the meter between radio and antenna
The right connection setup ensures accurate SWR measurement. The meter must sit between the transmitter and antenna system.
The correct setup requires:
Connect the antenna cable to the “ANT” or “ANTENNA” port on the SWR meter.
Connect the transmitter to the “TX,” “XMIT,” or “TRANSMITTER” port with a short patch cable.
Check all connections before taking measurements.
People often make mistakes by reversing these connections. The labels sometimes appear on the meter’s front panel instead of the connectors. This requires careful attention.
Systems with an antenna tuner follow this sequence: radio → SWR meter → antenna tuner → antenna. This setup lets you monitor true SWR values before the tuner matches them. The SWR displayed on radios with internal antenna tuners might show perfect matching. However, an external meter placed before the tuner reveals the actual, often higher SWR in the feedline.
Reading and interpreting SWR values
The SWR readings tell you a lot about your antenna system’s performance:
1.0 to 1.5: Great performance with minimal reflection. This range shows near-perfect power transfer from transmitter to antenna.
1.5 to 1.9: Good performance with small impedance matching issues. The system works well but could use some fine-tuning.
2.0 to 2.4: This range points to major issues with installation or antenna adjustment. You should fix these problems to avoid inefficiency and equipment stress.
Above 2.5: This zone shows serious mismatch issues. Running equipment with SWR above 3.0 can damage transmitter components and wastes significant power.
The measurement location affects your readings. Transmission lines reduce the reflected wave as it travels back to the source. SWR readings are highest near the antenna and get better with distance. You’ll get the most accurate antenna performance reading by placing the meter close to the antenna feedpoint.
Measuring across multiple frequencies gives you better insights. You can learn about your antenna system’s bandwidth by comparing readings at the lowest and highest channels of your operating range.
Antenna tuners are among the most misunderstood devices in amateur radio. These devices don’t actually tune your antenna—they serve a completely different purpose.
What do antenna tuners do
In stark comparison to this misleading name, antenna tuners (also called antenna matching units or transmatch) work as adjustable impedance transformers between your radio and antenna system. They accept whatever impedance the antenna presents and convert it to approximately 50 ohms—the impedance most modern transceivers need to see. This matching lets your transceiver deliver maximum power to the antenna system.
Your radio operates at full potential without activating protection circuits that would reduce power output when it sees a proper 50-ohm impedance match. High SWR conditions may trigger these “foldback” circuits and limit your transmitting capability without an antenna tuner.
Note that the tuner only changes the impedance your radio sees—it doesn’t affect the actual SWR between the tuner and antenna. Any high SWR beyond the tuner stays unchanged and may still cause power loss as heat in your feedline.
Popular antenna tuners
Two main types dominate the market:
Manual Tuners
Feature two variable capacitors and a switchable inductor
Need hands-on adjustment to find optimal settings
More reliable because they need no power source
Cost less than automatic models
Handle wider impedance ranges in many cases
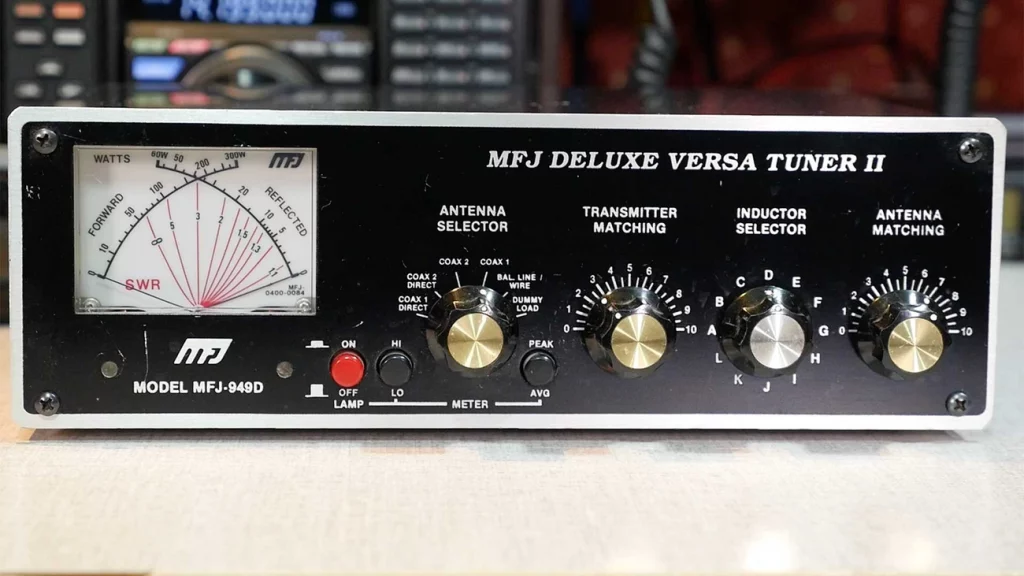
Popular models include the Comet CAT-300 which is an excellent tuner
Automatic Tuners
Select combinations of inductors and capacitors faster via relays
Offer “push-button” convenience with minimal operator involvement
Come in indoor and remote/outdoor weatherproof versions
Keep frequency/settings in memory for quick band changes
Have limited matching range compared to some manual tuners
Built-in automatic tuners come with most modern transceivers. These are designed to make minor impedance corrections—typically handling SWR up to only 3:1. External tuners become vital for bigger mismatches or non-resonant antennas like random wires.
Using an antenna tuner
Manual tuners require this simple procedure:
Turn your transmitter power down to its lowest setting to protect components
Select your desired operating frequency
Set your radio to a constant carrier mode like CW or AM
Adjust the inductor dial until you hear maximum noise (without transmitting)
Transmit at low power and adjust capacitors to achieve minimum SWR
Note the settings for future reference
Automatic tuners need just a press of the “tune” button while transmitting at reduced power. The tuner cycles through various combinations until it finds the optimal match, usually within seconds.
You should know that antenna tuners help your radio operate more efficiently with imperfect antennas, but they don’t improve the antenna’s actual radiation characteristics. Using properly resonant antennas remains the best approach whenever possible.
Proper antenna tuning changes a mediocre radio setup into an exceptional one. You need patience, precision, and proper technique to achieve the best performance.
Tuning mobile antennas in-place on vehicles
Your mobile antennas must be tuned while mounted on the vehicle they’ll be used with. Similar vehicles can produce different results because of slight variations in body construction and mounting location. First, park your vehicle far from buildings, light posts, and metallic objects that could affect readings. Take measurements with all doors and hatches closed to ensure consistent results.
To tune a mobile antenna:
Cut the antenna slightly longer than needed—you can always remove material but adding it back is impossible
Connect your analyzer between the radio and antenna
Sweep frequencies wider than your operating range to see the performance curve
Check if adjustments are needed based on SWR readings:
If SWR on high-frequency channels (like channel 22) exceeds low-frequency channels (like channel 1), your antenna is too long
If SWR on low-frequency channels exceeds high-frequency channels, your antenna is too short
For lengthy antennas, trim in small increments (1/8″ to 1/4″) until you reach optimal SWR
Adjusting portable antennas in open environments
Portable antennas need tuning “in the clear” to simulate real-life conditions. Mount them on non-conductive supports with plenty of free space around them. You can also suspend them from non-conductive cord at their typical operating height.
For directional antennas like Yagis:
Start with the antenna aimed in one direction
Transmit and wait 60 seconds to record signal readings
Rotate the antenna 45 degrees (matching compass points: N, NE, E, etc.)
Wait another 60 seconds and record new readings
Keep going until you complete a full 360° rotation
Choose the direction that gives you the strongest readings across your desired frequencies.
Equalizing SWR at band edges for resonance
The main goal of antenna tuning is making it usable across its designed frequency range. You want equal SWR readings at both ends of your frequency band instead of focusing only on the lowest possible reading.
For dipole antennas:
Pick your target frequency for resonance tuning
Calculate estimated length using the formula: 234/frequency (MHz)
Measure SWR at both band edges
If readings differ by a lot, adjust antenna length:
Shorten both elements equally to raise resonant frequency
Lengthen both elements equally to lower resonant frequency
Small adjustments often lead to big improvements. Precision is key—moving an antenna a few inches or changing length by 1/4″ can transform its performance completely.
Adjusting for Impedance, Reactance, and Resonance
Proper impedance matching is the foundation of antenna tuning that bridges theoretical physics and practical radio operation.
Identifying if the antenna is too long or too short
The SWR curve across frequencies tells us if an antenna needs lengthening or shortening. This relationship shows clear patterns:
SWR readings lower than your target band mean your antenna is too long
SWR readings higher than your target band indicate your antenna is too short
To name just one example, a mobile CB antenna might show SWR of 1.3 on channel 1 (26.965 MHz) and 2.5 on channel 40 (27.405 MHz). This means the antenna needs shortening to raise its resonant frequency. You should trim small amounts at a time—usually 1/8 to 1/4 inch—until the readings balance across your operating range.
Understanding impedance mismatch and reactance
An antenna’s impedance has two parts: resistance and reactance. The resistance shows power that radiates or becomes heat, while reactance shows energy stored in electromagnetic fields around the antenna.
A resonant antenna’s impedance becomes purely resistive (about 73 ohms for a dipole in free space), and reactance drops to zero. The antenna develops reactance off resonance—either inductive (positive) when it’s too long, or capacitive (negative) when it’s too short.
Reactance creates impedance mismatch that causes reflected power. The transmitter impedance (usually 50 ohms) should match the antenna system’s impedance to transfer power effectively. High impedance mismatches can damage your equipment. A transmitter pushing 10,000 watts into an SWR of 10:1 would see voltage peaks above 2,200 volts.
Resonant frequency and its role in tuning
Resonant frequency happens right where inductive and capacitive reactances cancel out. The antenna appears purely resistive to the transmitter at this point.
Physical dimensions determine antenna resonance. Larger antenna elements create lower resonant frequency. You can tune precisely by adjusting length:
Shorter antennas have higher resonant frequency
Longer antennas have lower resonant frequency
The formula 234/frequency(MHz) gives you a starting length for dipoles
A resonant antenna doesn’t always show exactly 50 ohms impedance. A resonant dipole’s feedpoint resistance is about 73 ohms, which creates a small mismatch (SWR = 1.5) even at perfect resonance.
Common mode currents work as a hidden enemy in your antenna tuning efforts. Your system’s performance can suffer by a lot even with perfect SWR readings when these unwanted currents flow on your coaxial cable shield’s outside.
Detecting common mode currents via SWR changes
You can spot common mode currents through erratic SWR behavior. Your SWR readings will change as you move or touch the feedline – this is a clear sign. These currents are likely causing trouble if your antenna’s SWR changes with different coax lengths without other modifications.
Watch out for these signs:
RF interference with household electronics
Disrupted antenna radiation patterns
Higher noise levels during reception
RF “burns” when touching metal components near your radio
You can run a simple test. Check your analyzer while moving your hand along the coax—any reading fluctuations show current on the shield’s exterior.
Using baluns for balanced antennas
Baluns (balanced-to-unbalanced transformers) stop feedline radiation by blocking common mode currents. Current baluns work better than voltage baluns for most antenna systems.
Your antenna system stays isolated because current baluns add impedance to unwanted common-mode paths. This isolation prevents the coaxial shield from becoming an unplanned radiating element of your antenna.
Pick your balun based on your antenna type:
For dipoles and other balanced antennas: 1:1 current balun at the feedpoint
For raised vertical antennas: feedline current choke positioned under the radials
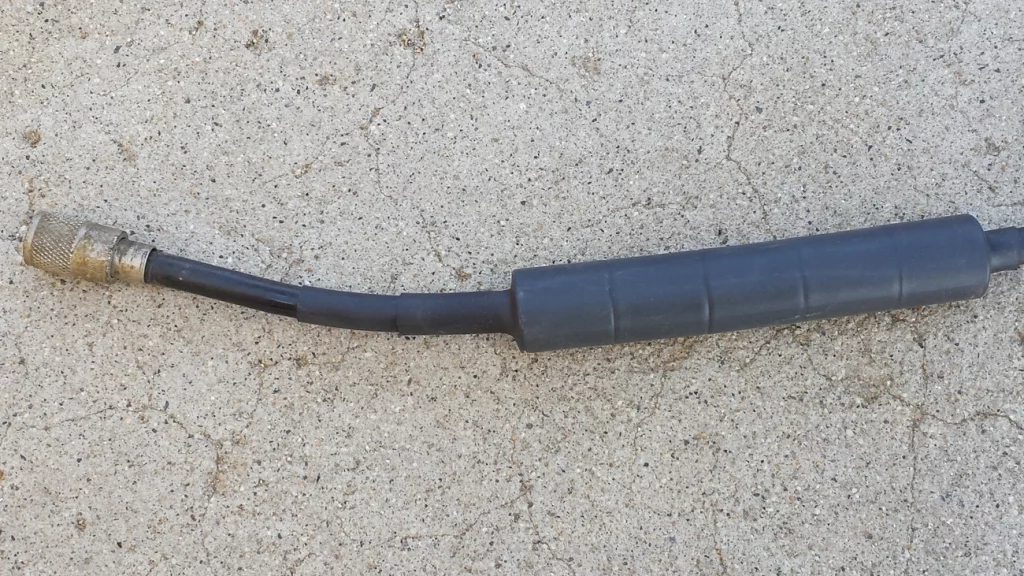
Building simple common mode chokes (Ugly Baluns)
The “ugly balun” stands out as the simplest common mode choke. It’s just coiled coaxial cable that creates inductive choking against unwanted currents.
Here’s how to build an effective air choke:
Use 18-21 feet of coax to cover 3.5-30MHz
Wind it in a single layer around a 3-5 inch non-conductive form
Secure the first and last turns to the form with nylon ties
Keep the first and last turns separate
The choke’s location matters a lot. Put it as close as you can to the antenna feedpoint to stop feedline radiation. Stubborn issues might need a second choke about 1/8 wavelength down the line for extra suppression.
Tuning Different Antenna Types
Different antenna designs need their own special tuning methods. The way adjustments affect performance depends on each antenna’s physical structure.
Whips, dipoles, loops, and J-poles
You need to adjust the length of whip antennas to achieve resonance. For mobile installations, the vehicle’s body creates capacitive effects that affect tuning. The whip’s length determines its electrical characteristics – shorter lengths raise frequency while longer lengths lower it.
A simple formula helps with dipole antennas: divide 468 by frequency(MHz) to get the total length in feet. Both elements usually need equal adjustments. You should cut dipoles a bit longer than calculated because removing wire is easier than adding more.
J-pole antennas let you tune through element length and feed point positioning. The main adjustment works with the 1/4 wave matching stub – shorter stubs raise resonant frequency while longer ones lower it. The feed point position needs adjustment along both radiator and stub to get the best SWR.
Multi-band antennas and section-wise tuning
Multi-band antenna tuning needs a step-by-step approach. Always start with the highest frequency band and work your way down. This order matters because higher band adjustments affect lower bands.
The process for trap-type vertical antennas:
Start by adjusting the trap housing for the highest band
Make very small movements as frequency changes faster
Check all previous adjustments after each band is optimized
Multi-band antennas use tuning networks with multiple adjustment points. These points interact with each other, making them harder to tune than single-band antennas.
Gamma, Y, and T match adjustments
Gamma matching systems do three things: they transform impedance, compensate inductively, and convert balanced-to-unbalanced signals. You need to coordinate three things when adjusting a gamma match: rod length, rod spacing, and gamma capacitor.
T-matches work as shunt-matching techniques for dipoles or Yagi antennas’ driven elements. Y-matches provide similar functions with different physical layouts. These matching systems help transform impedance precisely between the antenna’s natural impedance and the feedline impedance you want.
The antenna should be in its final position during tuning because nearby objects affect impedance characteristics by a lot. You’ll need to switch between adjustments until you get the lowest SWR.
Conclusion: How to tune an antenna
Antenna tuning is the life-blood of effective radio communication. This piece explored how SWR and return loss indicate your antenna system’s performance. These measurements show if radio energy radiates into the air or reflects back to your equipment.
You need to understand a few basic concepts to get optimal antenna performance. Your antenna resonates when inductive and capacitive reactances cancel each other out and create a purely resistive load. Good impedance matching maximizes power transfer between your radio and antenna system. The suppression of common mode currents prevents unwanted radiation from feedlines.
Radio operators should know that different antenna types need specific tuning approaches. Whips, dipoles, loops, and multi-band antennas come with their own challenges. The tuning process follows similar principles whatever the design. You measure performance, make precise adjustments, and verify improvements across your operating band.
Antenna tuners are practical solutions for impedance mismatches but can’t improve an antenna’s basic radiation characteristics. A properly designed and installed antenna is vital before you try matching devices.
Antenna tuning blends science with art. The process needs patience, precision, and systematic testing. Perfect 1:1 SWR might be hard to achieve in real-life conditions. Even small improvements can dramatically boost your communication range, signal clarity, and equipment life. Radio enthusiasts who become skilled at these techniques will discover their system’s full potential and avoid common amateur setup problems.
You can get into digital mobile radio for very little these days, and talk to people around the world without needing fancy equipment or big outdoor antennas. That’s pretty amazing when you think about it. The European Telecommunications Standards Institute created DMR back in 2005, and it’s completely changed what’s possible with ham radio.
I’ve found DMR offers some real advantages over the analog radios I’ve used for years. The two-slot TDMA technology lets two conversations happen at the same time on one 12.5 kHz channel – something impossible with analog. My batteries also last about 40% longer with DMR radios, which is a huge plus when I’m operating away from power sources.
The growth of DMR has been incredible. Last time I checked, there were approximately 5,500 repeaters and 16,000 hotspots connected worldwide, and that number from 2016 has surely grown since then. DMR comes in three flavors – Tier I (no license needed), Tier II (licensed conventional systems), and Tier III (trunked operation). Most hams I know use Tier II. The best part? Even if you only have a Technician class license, you can use DMR.
Getting started isn’t quite as simple as turning on an analog radio, though. You’ll need to wrap your head around some new concepts like DMR IDs, talk groups, and code plugs. Those code plugs (the configuration files for your radio) can take hours to set up right the first time. Trust me, I’ve been there.
This guide will walk you through everything you need to get on the air with DMR in 2025. I’ll cover choosing equipment, programming your radio, and connecting to the most popular talk groups worldwide. Let’s jump in.
What is DMR and Why It Matters in 2025
The European Telecommunications Standards Institute (ETSI) created Digital Mobile Radio as an open international standard back in 2005. I’ve watched it grow from a niche technology into the robust communication platform we see today. It’s amazing how something designed to simply be a cost-effective digital alternative to analog systems has spread across so many different radio services.
DMR as an ETSI Standard Since 2005
What makes DMR special in my experience? For one, it’s a direct replacement for analog Private Mobile Radio. You can use it on existing licensed PMR bands without needing any rebanding or relicensing. This was incredibly smart – it made switching from analog to digital much easier for organizations that already had frequency allocations.
The secret sauce in DMR is something called Time Division Multiple Access (TDMA). This essentially splits a single 12.5 kHz channel into two alternating timeslots. Think of it like having two separate conversations taking turns using the same phone line, but switching so fast you never notice the gaps. This clever approach doubles channel capacity while working with existing frequency allocations.
DMR isn’t just about efficient channel use though. It also gives you:
Fast call setup capabilities
Individual and group calling functions
Emergency and priority call support
Full duplex communications
Short data message services
IP-packet data transmission
The DMR Association has supported the standard since 2005. With over 200 companies involved, they make sure equipment from different manufacturers works together and keep pushing the technology forward. This interoperability is something I really value – I don’t want to be locked into one manufacturer’s ecosystem.
Tier I, II, and III: What They Mean for Hams
DMR has three different “tiers” that serve different purposes. I find this tiered structure makes a lot of sense once you understand it:
Tier I (Unlicensed) is where a lot of people in Europe start. These are license-free radios limited to 0.5 watts in the 446 MHz band in Europe. You don’t need a license, there’s no repeater access, but you still get that crystal-clear DMR audio quality. They are popular for hiking and camping trips with friends – perfect for beginners. These are almost never used outside of Europe, or by amateur radio operators anywhere in the world.
Tier II (Licensed Conventional) is what most of us hams use. This tier was designed to replace conventional analog repeater systems while adding digital capabilities. You’ll need a license to use these frequencies between 66-960 MHz, but you get much more:
Repeater operation for extended coverage
IP connectivity for linking multiple repeater sites
Advanced voice features and integrated data services
Higher power output compared to Tier I
Tier III (Licensed Trunked) is the heavy-duty professional tier, mainly used by emergency services and commercial applications. It was added in 2012 and introduces trunking, which automatically assigns channels on demand. This maximizes efficiency but requires much more complex infrastructure. I’ve never personally used Tier III, but I’ve seen it in action with our local emergency services.
Why DMR is Gaining Popularity Among Technicians
The digital mobile radio market is growing like crazy. It’s expected to jump from $7.94 billion in 2025 to $12.73 billion by 2029, with a growth rate of 12.5%. Why are so many technician-class operators jumping on board? I can think of several reasons:
Enhanced Capabilities: The voice quality on DMR is simply superior. It filters out background noise and maintains clarity even in challenging conditions. I’ve had clear conversations at the very edge of coverage where analog would have been unintelligible static.
Economic Accessibility: You can get started with DMR for much less money than even five years ago. The equipment ranges from budget to high-end, so there’s something for every wallet.
Network Growth: Thousands of new users join BrandMeister (the largest DMR network) every month. More users means more people to talk to and a more vibrant community.
Simplified Entry Points: Companies like BridgeCom now offer “Plug & Play” packages with both radios and hotspots. This makes getting started much easier than when I first dove into DMR and had to figure it all out myself.
Spectrum Efficiency: That TDMA approach I mentioned earlier makes very efficient use of limited frequency space. This matters more and more as our radio bands get increasingly crowded.
Advanced Features: Beyond just talking, DMR gives you text messaging, GPS tracking, and group calls. These additional capabilities make it feel more like modern communication technology.
I won’t sugar-coat it though – there’s definitely a learning curve when you first get into DMR, especially around programming and setup. But the resources available now are so much better than when I started. As interfaces become more user-friendly, I expect DMR will continue to grow as a cornerstone of amateur radio communication in 2025.
I’ve used both analog and digital radios for years now, and the differences between them are pretty striking. While analog has been the go-to for decades, DMR brings some serious advantages to the table – along with a few drawbacks you should know about.
Audio Quality and Signal Clarity
The first thing you’ll notice when switching from analog to DMR is how much clearer the audio sounds. Analog radios pick up everything – including all that background noise you don’t want. I remember trying to talk on my old analog handheld at a hamfest once, and people could barely understand me with all the crowd noise coming through.
DMR does something really clever – it uses digital processing to filter out most of that background racket and focuses on your voice. This makes a huge difference in noisy environments. As one expert put it, “With digital radios, encryption can be used without degrading the quality of the audio, or the range at which the radio works”.
What’s even more interesting is how the signals behave at the edge of coverage. With analog, you get that familiar fade into static as you move away from the transmitter. DMR stays crystal clear until you hit that digital cliff where it just drops out completely. No static, just gone. “Digital radios feature real-time audio processing that focuses on speech and reduces any background noise. This means that the received audio quality is enhanced when compared to an analog radio system”.
Spectrum Efficiency and Time Slot Usage
One of DMR’s biggest selling points is how efficiently it uses spectrum. Thanks to Time Division Multiple Access (TDMA) technology, you get twice the conversations in the same space:
“DMR uses the two-slot TDMA in a 12.5 kHz channel – this means that, as opposed to analog communication, you have two slots for communication instead of one”.
To break this down simply:
With analog, one channel means one conversation
With DMR, one channel can handle two separate conversations simultaneously
The time slots switch back and forth so quickly (in milliseconds) that you don’t notice any gaps. It’s really quite impressive when you see it in action.
Learning Curve and Setup Complexity
Here’s where I have to be honest – DMR isn’t as plug-and-play as analog. With most analog radios, you punch in a frequency, maybe a PL tone, and you’re good to go.
DMR requires a lot more setup work. As someone who’s helped plenty of hams get started with DMR, I can tell you the learning curve is real. “Digital products are more advanced than analog radios, and so they aren’t as user-friendly for first-time users. It may take more time to learn and get used to it, similar to getting a new cell phone and learning all the new features”.
You’ll need to connect your radio to a computer, use programming software, and wrap your head around new concepts like talk groups, color codes, and time slots. As one frustrated ham put it: “First you have to figure out all the various FM features of a new HT (which is seldom intuitive) and then you must venture into the DMR morass of programming talk groups, frequencies, offsets, PL and colors”.
Internet requirement vs radio to radio
Another big difference is how these systems connect. Analog is straightforward – radio talks directly to radio or through a repeater. No internet needed. It is also a lot easier to configure and get started.
Emergency communications are also almost exclusively analog so if you are looking for something for your bug-out bag, or in case you get lost on a hike miles from any civilization, analog may be a better choice.
DMR can work directly between two radios as well, but many of its coolest features come from internet connectivity:
“DMR radios are able to communicate with each other directly without a centralized system, but this is not always an ideal situation. Signals between radios connecting directly to each other can be hampered by obstructions in the line-of-sight between them such as trees, buildings, and hills”.
While radio to radio DMR is indeed possible and fairly common with business users, it is very rare with ham radio entheusiasts. Probably 95% or more of the ham radio users I have met that use DMR use it with hotspots and the internet.
What makes DMR really shine is how internet-linked repeaters and hotspots create worldwide networks. I can sit in my living room with a handheld DMR radio and a small hotspot and talk to someone in Australia. Try doing that with a simple analog HT!
“The low-cost and increasing availability of internet-linked systems has led to a rise in DMR use on the amateur radio bands”.
One last thing worth mentioning – DMR radios typically get up to 40% longer battery life than their analog cousins. For those of us who operate in the field, that’s a huge advantage.
Popular DMR Radios for Beginners
Picking your first DMR radio can feel overwhelming with so many options out there. I’ve tried quite a few models over the years, and there are definitely some standouts that make the learning curve less steep for beginners. Let me walk you through the ones I think give you the most bang for your buck in 2025.
AnyTone 878UVII and BTECH DMR-6X2
The AnyTone AT-D878UVII Plus has become my go-to recommendation for folks just getting into DMR. This dual-band handheld can reach repeaters over 30 miles away without needing a hotspot. I really appreciate the battery life on these, and the USB-C rechargeable batteries make keeping it powered up super convenient.
If you want something similar but with a few extra bells and whistles, the BTECH DMR-6X2 uses the same platform as the D878UVII+ but adds some nice enhancements. The DMR-6X2 PRO gives you:
Both radios have Bluetooth, which is great if you want to use a wireless headset or remote PTT button. This has been a lifesaver for me when operating mobile or when I need my hands free.
TYT MD-380 and MD-9600 Overview
If you’re watching your budget, the TYT MD-380 is probably the most affordable way to get started with DMR. You can find these single-band radios (either VHF or UHF) pretty cheap, and they use a superheterodyne receiver that gives better sensitivity than some other budget options. There are even books specifically for this DMR radios such as Using DMR with the TYT MD-380/390 & MMDVM.
For those looking to put a radio in their vehicle, the TYT MD-9600 is a solid dual-band mobile option with good power output (45-50W). It offers:
Storage for 10,000 contacts and 3,000 channels
Four power settings to choose from
IP54 compliant microphone
Upgradable firmware
I like the MD-9600’s audio – it’s clean and loud through that 5W receive audio amp, which makes a big difference when you’re in a noisy car. The cooling system with heat sink and fan also keeps it from overheating during long transmissions, which I’ve found to be an issue with some other mobile rigs.
Radioddity GD-88 and GD-77 Comparison
The Radioddity GD-88 is a big step up from their earlier GD-77. I was impressed when I first tried one – it has two separate VFOs so you can operate on VHF and UHF at the same time, plus you can select either 7W or 2.5W output power.
What really sets the GD-88 apart are some advanced features you usually only find in pricier radios:
Cross-band repeater function between analog and digital
Same Frequency Repeater capability
GPS with APRS functionality
Room for up to 300,000 DMR contacts
The battery life is pretty remarkable too – a 3000mAh battery that gives you up to 23 hours in digital mode. I appreciate that the desktop charger can hold both the radio and a spare battery.
Baofeng DMR Options
You knew Baofeng would be on this list, right? Their DMR lineup gives you the most bang for your buck if you’re really trying to keep costs down. The DM-1701 is dual band (VHF/UHF) and stores 3,000 channels, 10,000 talk groups, and 120,000 contacts.
The 2200mAh battery in the DM-1701 gives you about 18 hours of use and 48 hours on standby – roughly 30% longer than similar DMR radios in this price range. You also get:
True 2-time slot DMR operation
Color TFT display (1.77″)
SMS, emergency alarm, and encryption features
FCC Part 90 certification
Baofeng’s newer DM-32 adds GPS/APRS and some simulation features the earlier models didn’t have. I haven’t used this one as much, but the specs look promising.
Retevis RT3S and Radtel RT-4D
The Retevis RT3S is compact with dual band capability and GPS built in. It supports up to 3,000 channels and works with MOTO TRBO Tier I and II standards. The 2000mAh battery gives you about 16 hours of operation, which is decent for its size. It is extremely affordable and there are even books specific to this radio for DMR such as Using DMR With the Retevis RT3s & MMDVM.
The Radtel RT-4D is interesting because it offers:
Expanded frequency coverage including aviation band reception (108-136 MHz)
1024 channels across 250 zones
Support for 2,000 digital contacts
Advanced encryption methods (ARC/AES-128/AES-256)
You can also customize things like startup logos, voice announcements, and function keys on the RT-4D.
When choosing your first DMR radio, don’t just look at features and price. Consider how easy it is to update the firmware, the quality of the programming software, and how much community support exists. Most radios I’ve mentioned here have upgradable firmware and decent programming software, which should keep them useful as DMR technology evolves.
Understanding Hotspots: What They Are and How They Work
When I first got into DMR, I quickly ran into a problem – there weren’t any repeaters in my area. That’s when I discovered hotspots, and they completely changed my DMR experience.
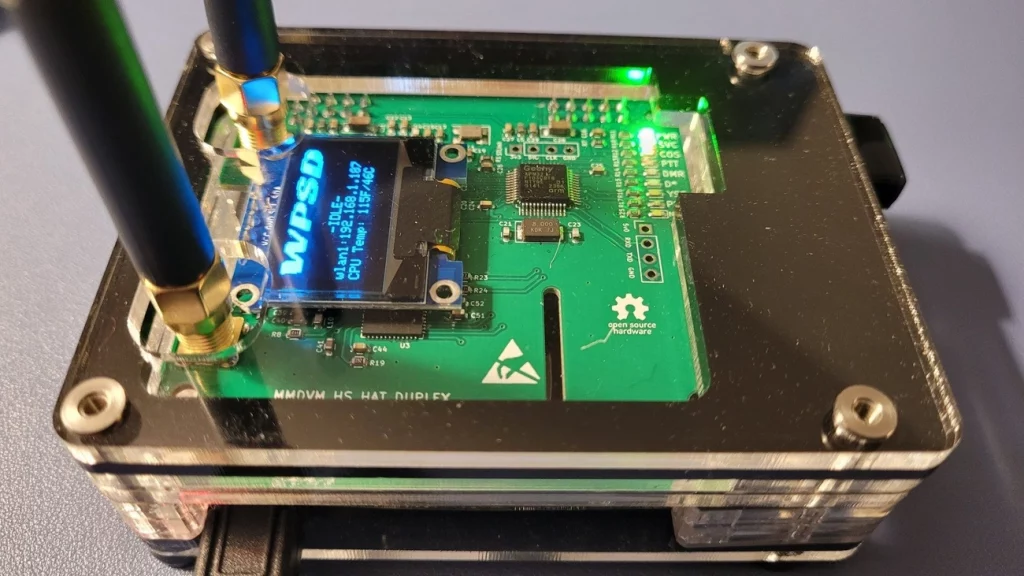
A DMR hotspot is basically your personal gateway to connect your digital radio to worldwide networks. Think of it as a mini-repeater that sits on your desk or goes in your pocket. Instead of needing a big repeater tower somewhere, your little hotspot connects to the internet and bridges your radio to DMR networks around the world.
Hotspots typically cover a few hundred feet to maybe a mile depending on where you put them and what antenna you’re using. Unlike the big repeaters that need serious infrastructure and licensing, these little boxes run at low power and connect through your home internet or even your phone’s hotspot.
Simplex vs Duplex Hotspots
There are two main types of hotspots, and the difference matters:
Simplex hotspots use just one frequency for both transmitting and receiving. This means they can’t do both at the same time, which limits them to one time slot at a time. They’re usually cheaper, which makes them great for beginners just getting started. I started with a simplex hotspot and it served me well for quite a while.
Duplex hotspots, on the other hand, use separate frequencies for transmit and receive, letting you access both DMR time slots at the same time. This is super handy if you want to monitor one talk group while talking on another. As one ham told me, “I tend to use one timeslot for monitoring channels and the other for talking. That way if one slot is busy I can still get out using the other”.
Which one should you get? It depends on your budget and how you plan to use it. Most hotspots on Amazon cost between $120-$200, with the duplex models usually at the higher end.
Pi-Star: Software and Hardware Options
When shopping for hotspots, you’ll run into two main platforms:
Pi-Star is an open-source software that runs on Raspberry Pi computers. It handles “complex services and configuration for Digital Voice on Amateur radio in a way that makes it easily accessible to anyone just starting out”. To build a Pi-Star hotspot, you’ll need:
A Raspberry Pi (I recommend the Pi Zero 2 W if you want something very inexpensive, or a Raspberry Pi 3B+ if you want the best experience)
Using a Hotspot with a Mobile Phone or Wi-Fi Dongle
One of the coolest things about hotspots is using them on the go. You’ve got a few options:
Your smartphone makes a great internet connection for your hotspot. “For less than USD 100.00, you can get a MMDVM hotspot device, and use your cell phone as the bridge to the internet”. This setup lets me operate from pretty much anywhere I’ve got cell service – parks, camping trips, you name it.
If you don’t want to drain your phone battery, dedicated USB Wi-Fi dongles work great too. “Pi-star out of the box supports this USB dongle, in fact it shows up as an ethernet device so it just works”. I’ve found phone pairing can sometimes be frustrating – it can be “somewhat time consuming” and often requires “repeating the process a few times”.
For home setup, nothing beats a direct ethernet connection: “If you operate your DMR Hotspot at home and you can connect via ethernet YOU SHOULD”. I noticed an immediate improvement in audio quality when I switched from Wi-Fi to ethernet for my home hotspot setup.
Codeplug Programming: The Core of DMR Radio Setup
If there’s one thing that separates DMR from the analog radio world, it’s the codeplug. I remember the first time I tried to program a DMR radio – I spent an entire weekend figuring out what seemed like an endless maze of settings. Let me walk you through what I’ve learned since then.
What is a Codeplug and Why It’s Important
A codeplug is basically a configuration file that tells your DMR radio everything it needs to know to operate. Think of it as the brain of your radio. While analog radios might just need a frequency and maybe a PL tone, DMR radios need a whole lot more information packed into these files:
Contacts: All your talk groups, reflectors, and individual DMR IDs
Channels: The frequencies, color codes, time slots, and which contacts to use
Zones: Groups of channels that make sense together so you’re not scrolling forever
Without a properly configured codeplug, your fancy DMR radio is just an expensive paperweight. I’ve seen hams spend $500 on a radio only to get frustrated because they couldn’t program it correctly. As one expert puts it, “To the uneducated eye this may look confusing and complicated,” but once you understand the basics, it gets much easier.
Reading and Writing Codeplugs with CPS
Customer Programming Software (CPS) is what you’ll use to create and modify codeplugs. Each manufacturer has their own version, and they’re rarely what I’d call user-friendly. Remember Windows 95? Some of this software feels like it hasn’t been updated since then.
Before you do anything else, you need to set your unique DMR ID in the general settings. This ID is tied to your callsign and is how other stations identify you on the network. I still remember the first time I made a contact and the other operator greeted me by name before I said anything – that’s because their radio displayed my info based on my DMR ID.
Creating a codeplug typically follows this process:
Add all your digital contacts with the appropriate talk group IDs
Create channels linking frequencies with contacts and technical parameters
Organize those channels into logical zones for easier navigation
Here’s a tip from my experience: don’t go crazy adding every possible talk group and channel at first. I made that mistake and ended up with a confusing mess. Start with a handful of channels you’ll actually use, and build from there.
For beginners, I highly recommend finding a pre-built codeplug for your radio model and local area. This can save you “many hours of tedious programming.” You can always customize it later as you learn more.
Matching Firmware and CPS Versions
This is where things get tricky, and it’s something the sales brochures never mention. Your CPS version must match your radio’s firmware version. Period. If they don’t match, you’ll typically get frustrating error messages like “Model settings does not match.”
I learned this the hard way when I updated my radio’s firmware but used the old CPS software. Nothing worked, and it took me hours to figure out why. The relationship between firmware and CPS is tightly coupled because these programs make specific assumptions about memory layout in the radio.
When updating your radio, follow these steps:
Read the existing codeplug with your current CPS version
Export important settings to save them
Update the firmware following the manufacturer’s instructions
Install and use the matching CPS version
Rebuild and upload your codeplug
This technical process is definitely the steepest part of the DMR learning curve. The good news is that there are tons of helpful videos and forum posts that can guide you through the process for your specific radio model.
Simple? Not exactly. Worthwhile? Absolutely. Once you’ve got a working codeplug, the world of digital communication opens up in ways you never imagined with analog radio.
I remember my first attempt at creating a codeplug from scratch – talk about a headache! But after helping dozens of fellow hams get their DMR radios up and running, I’ve developed a straightforward process that works every time. Let me walk you through it.
Setting Radio ID and General Settings
First things first – you need your personal DMR ID. If you don’t have one yet, head over to RadioID.net to get your unique seven-digit identifier. This is like your digital callsign in the DMR world.
Once you’ve got your ID, open up your radio’s CPS software (every manufacturer has their own version). Look for the General Settings section – it’s usually right at the top. Enter your DMR ID in the designated field. This is absolutely critical – without it, nobody will know who’s transmitting.
While you’re in the general settings, I usually set my squelch level to about 3, give my radio a name for the power-on display (mine says “KB8XXX DMR”), and set a reasonable timeout timer. I prefer a 180-second timeout – long enough for me to finish a thought, but not so long I’d tie up a repeater if something went wrong.
Creating Digital Contacts and RX Groups
Now comes the foundation of your codeplug – your digital contacts. Think of these as your phone’s contact list, but for radio. For each talk group you want to use, you’ll need to create a contact with:
A descriptive name (like “World Wide” or “North America”)
Call type set to “Group Call” (most common for talk groups)
The numerical ID for that talk group
After loading up your contacts, you’ll need RX Groups. This confused me terribly when I first started with DMR. Basically, an RX Group is a collection of talk groups you want to hear on a particular channel. At minimum, include the talk group you plan to transmit on, but you can add others you want to monitor as well.
I found creating separate RX Groups for different purposes helps keep things organized. I have one for local stuff, one for regional, and one for my favorite international talk groups.
Channel Configuration: Time Slot, Color Code, Talkgroup
Now for the meat and potatoes – channel configuration. This is where you connect all the pieces together. For each channel you create, you’ll need to set:
A name that makes sense to you (I use location + talk group like “Main St-Local”)
The receive and transmit frequencies for your local repeater
Color code (usually 1, but check with your repeater operator)
Time slot assignment (1 or 2, depending on what the repeater uses for that talk group)
The TX contact (which talk group you’re transmitting to)
RX group list (which lets you hear other talk groups on this channel)
Getting the time slot right is super important. On my local repeater, all local talk groups are on TS1, while all the wider-area stuff is on TS2. Using the wrong time slot means nobody will hear you!
Zone and Scan List Setup
Once you’ve got your channels defined, organize them into zones. Think of zones like folders on your computer – they help you group related channels. Most radios show 16 channels per zone, so I organize mine geographically.
For example, I have zones for:
Downtown repeaters
Suburban repeaters
Travel (with channels I use when visiting other cities)
Scan lists are optional but incredibly useful. They let you monitor multiple channels without having to manually switch between them. I typically create scan lists with no more than 8-10 channels – any more and you miss too much as the radio cycles through them.
To set up a scan list:
Give it a descriptive name
Add the channels you want to monitor
Set priority channels if needed (I make my local emergency channel priority)
Assign the scan list to the appropriate channels
Saving and Writing to the Radio
Don’t skip this step! Once you’ve gone through all that work, save your codeplug to your computer with a descriptive filename. I use “RadioModel_MyCall_Date” format so I can keep track of different versions.
Before writing to your radio, make sure it’s powered on and properly connected with the programming cable. I’ve learned the hard way that some radios need to be turned on before connecting the cable, while others work better if you connect first, then power on.
Click “Write to Radio” and let the magic happen. This might take anywhere from 30 seconds to several minutes depending on your radio.
One last tip – whenever you want to make changes in the future, always read from the radio first. This ensures you’re working with what’s actually in the radio, including any changes you might have made directly on the device.
Now that you’ve got your codeplug set up, it’s time to configure your hotspot. This is where things get really interesting – your little personal gateway to the world. I’ve spent countless hours tweaking my hotspot settings, and I’ve found there are a few key areas that make the biggest difference in how well your setup works.
Assigning Static and Dynamic Talkgroups
When using a hotspot, you’ve got two ways to handle talkgroups – static and dynamic:
Static talkgroups stay permanently active on your hotspot. Think of them as always-on channels that will pass traffic whether you’ve recently used them or not. Setting these up takes a few steps:
Create an account on BrandMeister using your DMR ID
Generate an API key (look under “Security Settings”)
In Pi-Star, go to Expert settings and paste in your API key
Now you can add static talkgroups through the BrandMeister self-care portal
Dynamic talkgroups work differently – they activate temporarily when you transmit on that talkgroup’s channel. On BrandMeister, they typically stay active for about 15 minutes after your last transmission. If you want to clear all your dynamic talkgroups at once, just transmit the special code 4000. Pretty simple.
I really like the “auto-static” feature on simplex hotspots. It keeps your current talkgroup active until you transmit on a different one. This has saved me a lot of hassle when I’m having longer conversations.
Time Slot Mapping for Hotspot Use
Time slots work a bit differently depending on what type of hotspot you’re using:
If you’ve got a simplex hotspot (the most common type), you’re typically stuck with only Time Slot 2 due to some technical limitations
Duplex hotspots can use both Time Slot 1 and 2, which means you can monitor multiple talkgroups at once
The good news is that unlike with repeaters, you’ve got flexibility with personal hotspots. I’ve had people ask me, “Does it matter which timeslot I use on my hotspot?” The answer is pretty straightforward – not really. With your personal hotspot, you can assign talkgroups to either slot based on what works best for you.
Most hotspots use Color Code 1 by default. Think of this as DMR’s equivalent to the old CTCSS tones in analog radio.
Avoiding Interference with Satellite Bands
This part is really important. You absolutely must avoid transmitting in certain frequency ranges:
435-438 MHz (70cm satellite subband)
145.8-146.0 MHz (2m satellite subband)
Even though your hotspot puts out very little power, it can still cause interference with satellite operations. I’ve heard from the AMSAT Vice President-Operations that DMR signals have interfered with AO-92 satellite uplinks on 435.35 MHz.
The FCC is pretty clear about this too – regulations §97.201(b) specifically prohibit auxiliary stations (which includes hotspots) from operating in these segments. Always double-check your frequency settings before turning on your hotspot. I learned this the hard way when I accidentally set up on a protected frequency and had to reconfigure everything.
Most Popular Talkgroups to Get Started With
Think of talkgroups as the meeting places in DMR networks – they’re similar to channels but way more flexible. Once you’ve got your radio and hotspot up and running, you’ll need to know where the action is. Let me walk you through the talkgroups I’ve found most useful when getting started with DMR.
TG 91: Worldwide
Talkgroup 91 is where all the global action happens on BrandMeister. I spent hours listening here when I first got into DMR. It’s amazing to chat with operators from Australia one minute and Germany the next! Since it’s so popular, I’ve learned to keep a few basic rules in mind: keep conversations reasonably short, leave gaps between transmissions so others can jump in, and always listen before transmitting.
If you’re free on Saturdays at 16:00 UTC, check out the World Wide Check-In on TG 91. It’s a great way to get a feel for just how global the DMR community really is.
TG 3100: USA Nationwide
For those of us in the States, TG 3100 is home base. I use this as my primary calling channel when I’m looking to make domestic contacts. It connects with several CBridge systems too, which extends its reach.
One thing to remember – while international stations are welcome to participate, if you’re not a USA station having an extended chat with another non-USA station, it’s polite to move to another talkgroup. Think of it like not hogging the main phone line when others need to make calls.
TG 505: Australia Wide
I’ve had some great conversations on TG 505, which serves as Australia’s nationwide calling channel. You’ll typically find it on time slot 2. What’s cool about this talkgroup is that it opens every repeater and hotspot across the country (assuming they’re programmed properly).
The Aussies have good etiquette – after making contact on 505, they usually move to another talkgroup, often on time slot 1, to keep the main channel open for new calls. Smart system!
TG 3805: VK5 Statewide
For more regional chats in South Australia, TG 3805 operates on time slot 1. I like how this arrangement works – you can chat locally while the national talkgroups operate on different time slots. It’s less overwhelming than the nationwide groups and perfect for when you want a more manageable conversation circle.
TG 9: Local Repeater Use
TG 9 is different from all the others – it’s strictly local. When you transmit here, your signal stays on your local repeater and never goes out to the broader network. This makes it perfect for testing or local conversations where you don’t need to tie up network resources. I use it all the time for quick local checks. You’ll usually find TG 9 on time slot 2.
TG 9990: Parrot Echo Test
The Parrot (TG 9990) has saved me from embarrassment more times than I can count! This simple but essential talkgroup records and plays back your audio. It’s the first place I go when setting up a new radio or hotspot.
To use it, just set up a private call to 9990, transmit your message, and wait a moment – you’ll hear your own audio played back to you. This lets you check your radio setup, repeater connection, internet connectivity, and audio quality all in one go. Super handy!
!Hero Image for DMR (Digital Mobile Radio): The Beginner’s Guide You Actually Need in 2025
You can get into digital mobile radio for as little as $12 these days, and talk to people around the world without needing fancy equipment or big outdoor antennas. That’s pretty amazing when you think about it. The European Telecommunications Standards Institute created DMR back in 2005, and it’s completely changed what’s possible with ham radio.
I’ve found DMR offers some real advantages over the analog radios I’ve used for years. The two-slot TDMA technology lets two conversations happen at the same time on one 12.5 kHz channel – something impossible with analog. My batteries also last about 40% longer with DMR radios, which is a huge plus when I’m operating away from power sources.
The growth of DMR has been incredible. Last time I checked, there were approximately 5,500 repeaters and 16,000 hotspots connected worldwide, and that number from 2016 has surely grown since then. DMR comes in three flavors – Tier I (no license needed), Tier II (licensed conventional systems), and Tier III (trunked operation). Most hams I know use Tier II. The best part? Even if you only have a Technician class license, you can use DMR.
Getting started isn’t quite as simple as turning on an analog radio, though. You’ll need to wrap your head around some new concepts like DMR IDs, talk groups, and code plugs. Those code plugs (the configuration files for your radio) can take hours to set up right the first time. Trust me, I’ve been there.
This guide will walk you through everything you need to get on the air with DMR in 2025. I’ll cover choosing equipment, programming your radio, and connecting to the most popular talk groups worldwide. Let’s jump in.
FAQs
Q1. What are the key advantages of DMR over analog radio? DMR offers clearer audio quality, doubles channel capacity through TDMA technology, and extends battery life by about 40% compared to analog systems. It also provides enhanced features like text messaging and GPS tracking.
Q2. How do I get started with DMR as a beginner? Start by obtaining a DMR ID, selecting a compatible radio, and learning to program codeplugs. Familiarize yourself with concepts like talkgroups and time slots. Consider using a hotspot for easier access to worldwide networks.
Q3. What’s the difference between simplex and duplex hotspots? Simplex hotspots use a single frequency for transmitting and receiving, limiting them to one time slot. Duplex hotspots use separate frequencies, allowing access to both DMR time slots simultaneously for more flexibility.
Q4. Which talkgroups are recommended for new DMR users? Popular starting points include TG 91 for worldwide connections, country-specific talkgroups like TG 3100 for the USA, and TG 9990 for testing your setup. Local and regional talkgroups are also good for getting familiar with the system.
Q5. Is DMR communication private? While DMR offers features like private calls between specific IDs, it’s not truly private on amateur radio frequencies where encryption is prohibited. For fully private DMR communications, a business license and assigned frequencies are required.