The BaoFeng UV-5R can be programmed both by the keys that are on the radio, and by using software. You might for example just program the radio using the keys if you need to enter just a few memories or you are out in the field with no access to programming software or cables. Using the software would be much more beneficial if you needed to program a lot of memories, or needed to have multiple radios with the same memory settings (cloning radios).
I much prefer the software as it allows me to quickly go back in and make changes and then upload those changes to the radio(s) and since there are so many excellent videos on how to change the settings in the radio I will concentrate on using the software.
Think of this as your How To Program the BaoFeng UV-5R For Dummies which will walk you through each step necessary to program the BaoFeng UV-5R.
What you need
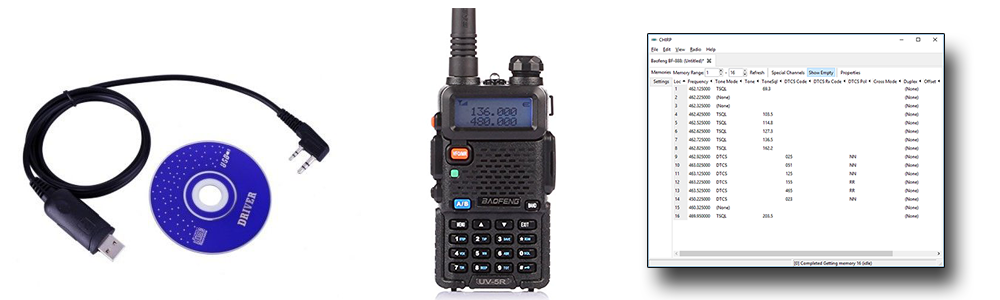
Of course to start with you will need the BaoFeng UV-5R radio. I bought two so I could use one in my car as a mobile while carrying around a second.
The next thing you need is the programming cable to program the BaoFeng UV-5R such as the one I used, the Compatible USB Programming Cable for Baofeng or the pretty well reviewed BTECH PC03 FTDI Genuine USB Programming Cable, both from Amazon.
Of course you will need a computer (Windows, Mac, or Linux) and the best free BaoFeng programming software is CHIRP which can program the BaoFeng UV-5R as well as many other radios. The BaoFeng UV-5R programming software free download can be found on the CHIRP website. There are several warnings when go to use this software with this radio because of the huge number of different firmware versions (and they are not upgradable). Fortunately I have had little problem with using CHIRP and the UV-5R radios.
Installing the programming software, CHIRP
Once on the CHIRP website click the link that says Click here to download the latest Windows version (or the link for Mac OSX or Linux), you will see the following screen for Windows users (Mac and Linux will be similar but from here on out I will only be showing the Windows version):
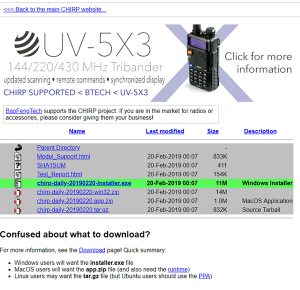
From this screen you want to click on the chirp-daily-xxxxxxxx-installer.exe link (where xxxxxxxx is the date of the file) which will start the download. Once the download is complete you might see the following screen from Windows:
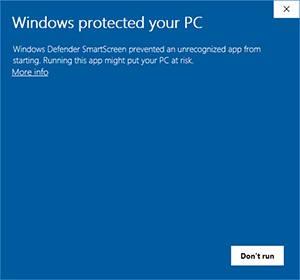
This is NOT because the file you downloaded is harmful, it is because Windows Smartscreen does not recognize the file and since it is an executable file, it is a little over cautious. Click the link that says “More info” shown above and you should see the next screen:
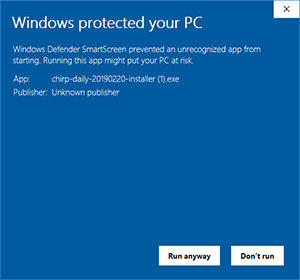
You can now click the “Run anyway” button at the bottom and continue the installation of CHIRP on your computer.
Installing the cable used to program the BaoFeng UV-5R
Once you plug the cable into the computer it will either automatically find and install a driver for it, or it will not. You can check your device manager to see which happened. In my case it showed the following screen:
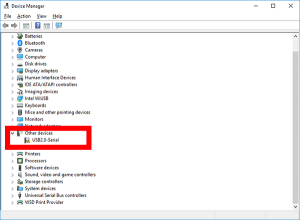
Note that it sees the cable, but does not know what to do with it. Since I opted for the Compatible USB Programming Cable for Baofeng to program the BaoFeng UV-5R, I received a cable and a small CD with the BaoFeng programming cable driver on it. Inserting the disc allowed me to install the driver which then shows up in device manager like this:
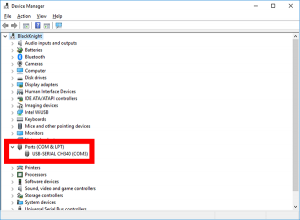
Take a good look at the information in the red box above, we will need it in a second to program the BaoFeng UV-5R.
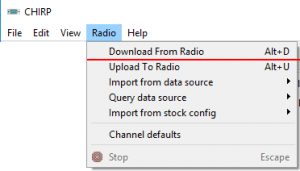
The next step is to plug in the radio, turn it on (on this radio make sure the volume is turned all the way up or your programming might fail), and launch the CHIRP software. The first time you run CHIRP you might see a pop up box that says that error reporting is enabled, you can just click OK and move on. Before we program the BaoFeng UV-5R we want to see what is already in the programming, click on the menu at the top and select Radio -> Download From Radio as shown here:
Now you will see a box pop up like the one below:
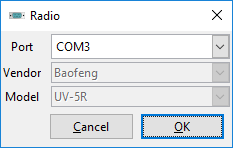
Here is where we need to use that information I told you that you would need in a second, the COM port number. I have set mine to COM3 and if you look up a couple images you will see that it matches what was shown in the device manager. Once you have the port set, set the Vendor box and Model box to what is shown in the image above and click OK. You should now see something like the following (note that this will vary depending on the radio type, firmware, etc):
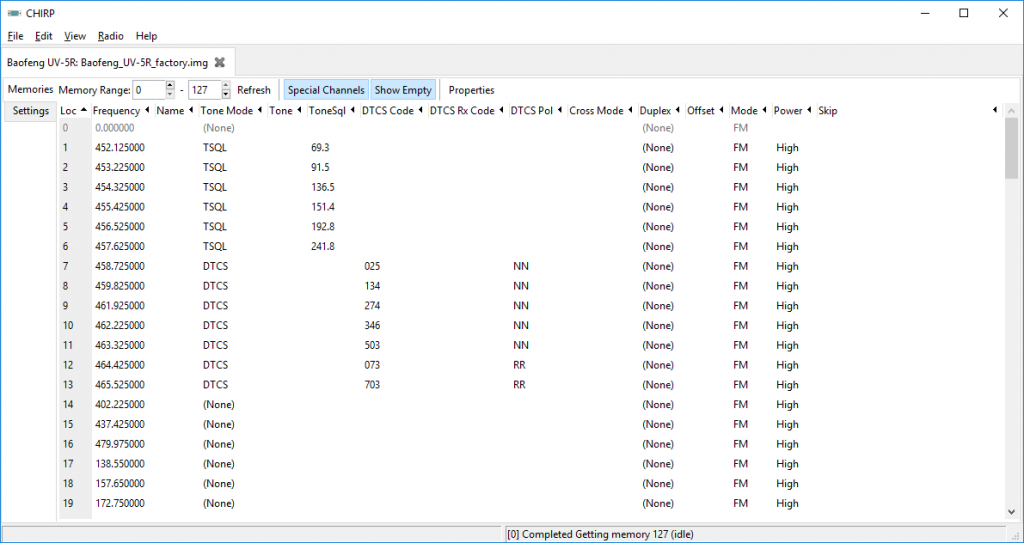
If you do not see this screen but instead get an error message about communicating with the radio, make sure that the cable is fully plugged into the side of the radio and that the volume is turned all the way up. You should not be able to see either of the silver plugs, there should be no gap between the radio black plastic and the black plastic of the plug. If there is a gap, push a little harder and you should feel a solid click, retry the connection and it should work. The vast majority of complaints I see about not being able to program the BaoFeng UV-5R is because of either the connection problem or volume being too low.
Before moving on, click on File -> Save and give the configuration a name so you have the original working configuration should you need it as it can be used as a BaoFeng UV-5R reset.
What frequencies to program the BaoFeng UV-5R
Below is a listing of legal frequencies you can use to program the BaoFeng UV-5R assuming you have a valid amateur radio license:
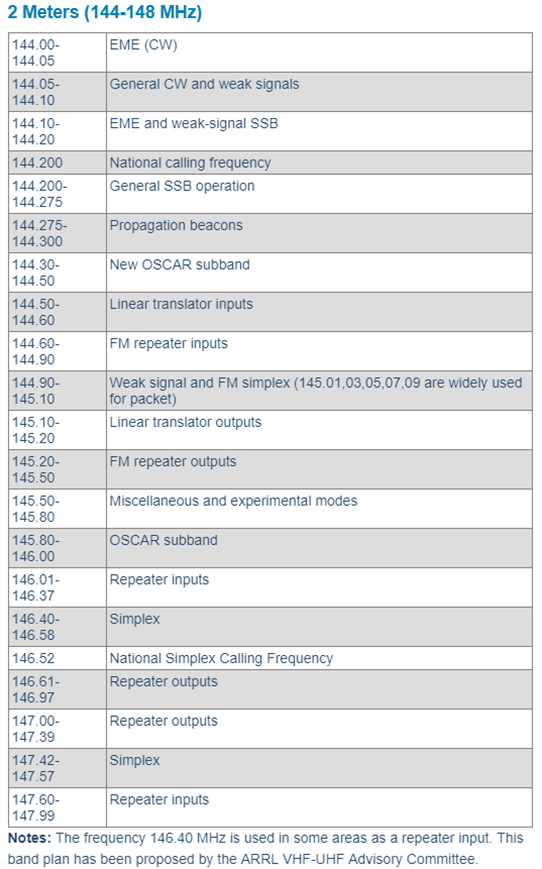
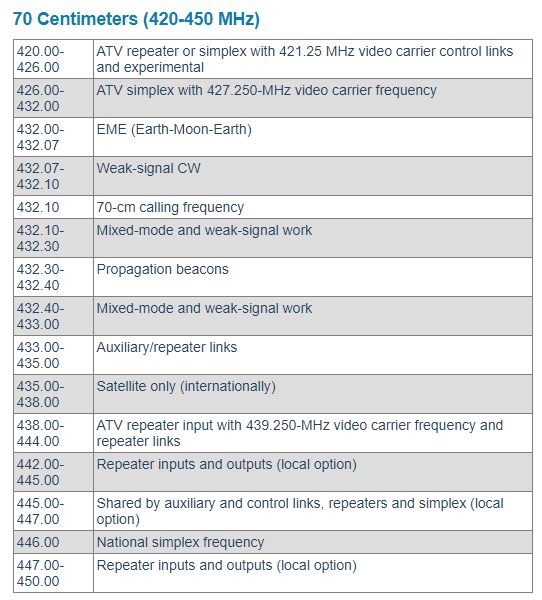
Shown above are the ARRL’s band plans for the 2m and 70cm bands (14x.xx is in the 2m band and 44xmhz is in the 70cm band) for use by licensed amateur radio operators. The three most common frequencies I have seen for simplex operation (what you do when one handheld talks directly to another handheld) are 446.00, 446.50, and 447.00. I would recommend you put those in the first three channels.
Next are other common simplex frequencies of 445.925, 445.950, 445.975, 446.025, 446.050, 446.075 so that gets us up to the first nine channels.
The rest of the channels can be filled by finding the frequencies for your local repeaters and using them to finish off the programming.
Note in the following image I have put in a name such as “HNTS 27”. When used in conjunction with turning on the name feature the display on your radio will show this instead of the frequency. I find this a lot easier to remember and in my case the name stands for Huntsville 186.270 repeater.
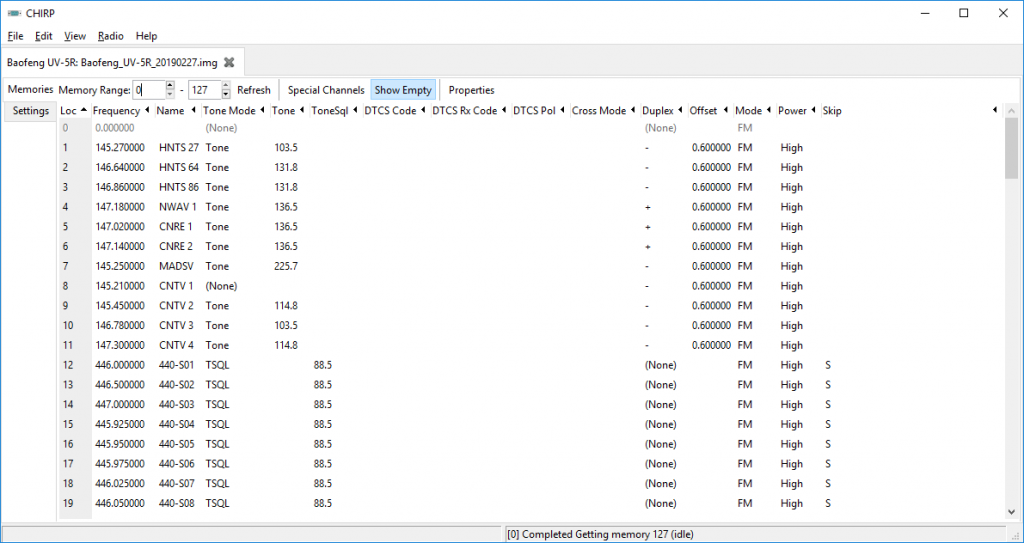
The image above is the default way I program the BaoFeng UV-5R. Note that not only do I have the frequencies put in, but on my 70cm simplex frequencies I also set the Tone Mode to TSQL and the TSQL value to 88.5. This was done so that one radio will only open the squelch when the other radio transmits, avoiding all the static of manually trying to adjusting the squelch.
Pro tip: When using TSQL you could very well transmit on a frequency that is already in use and never know it. It is very important you monitor the frequency before using it to make sure that no one else is currently operating on that frequency. To monitor the frequency when you have TSQL turned on press the top orange button on the side of the radio and that will manually open the squelch so you can listen for other traffic. Since my wife and I only use these in small confined areas where we are not too far from each other and typically on low power, I do not believe it is an issue.
Once I was happy with the configuration I would save it using File -> Save As on the menu (this allows me to not destroy the original in case I wanted to look at it or return the radio to factory).
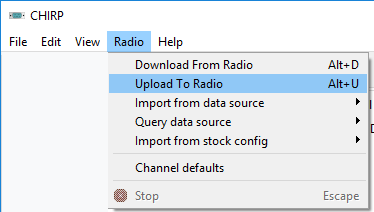
Now select Radio -> Upload To Radio from the menu:
If you are programming multiple radios you might see the following error when you upload the configuration to one of those radios:

This can be caused because the firmware on the radios is different. The easiest way to fix this is once you have done the upload and it gives you the error seen above, turn off the radio, close the current radio configuration tab, open a new configuration tab and download the radio’s configuration into that.

Now you can manually change the “other settings” as shown above and then upload this new configuration into the radio. In the screen above note that I have changed both the Display Mode (A) and Display Mode (B) to “Name”. Lastly, save this configuration for this specific radio.
Since I have two of these radios I saved the configuration for each one with the last three digits of the serial number of the radio on it (found under the battery) in the file name such as BFUV5R-01012019-123.img where the BFUV5R is the radio type, 01012019 is the date of the programming change, and 123 is the last three of the serial number for that specific radio.
You can now turn off the radio, disconnect the cable, turn the radio back on and start using it! If you talk into one radio and hear it on the other, you have successfully managed to program the BaoFeng UV-5R.
can you just program in frequency you use or in my case agencys you want keep.and use not to talk withbasicaly scanner frequences
Yes, you can just program it as a scanner. It is a terrible scanner, but you can certainly use it that way. You can even set the channels to not allow transmitting so you don’t accidentally transmit illegally.
Whats the procedure for doing that i tried everything i found and it dont work
Doing what?